Introduction to Cheesy Halloween Breadstick Bones
When it comes to celebrating Halloween, snacks are a key part of the fun! One delightful way to step up your Halloween game is by making cheesy Halloween breadstick bones. While store-bought options can be convenient, homemade snacks have a significant edge in terms of health.
Why Homemade Snacks Are Better For You
Making snacks at home allows you to control the ingredients, ensuring they are fresher and more nutritious. You can swap out unhealthy additives and preservatives often found in pre-packaged options for whole, natural ingredients. Did you know that many store-bought snacks have excess sugar and sodium? By crafting your own cheesy Halloween breadstick bones, you can tailor the flavors and textures to suit your preferences. This not only enhances your health but also allows for creative culinary exploration! Plus, you get the satisfaction of creating a dish from scratch.
The Joy of Cooking With Friends or Family
One of the best parts of preparing these spooky treats is sharing the experience with friends or family. Cooking can be a bonding activity that adds another layer of enjoyment to your Halloween festivities. Whether you’re assembling bones while chatting over music or hosting a mini cook-off, the laughter and creativity that fills your kitchen can be just as delightful as the cheesy Halloween breadstick bones themselves.
Imagine gathering around the kitchen island, dough flying through the air, and smiles all around as everyone pitches in. According to a study by the American Heart Association, cooking at home not only promotes healthier eating habits but can also strengthen family relationships through shared experiences.
So grab your apron and let the fun begin! Your cheesy Halloween breadstick bones are not just a treat; they’re an opportunity for camaraderie and creativity. Check out more tips on the joys of cooking at the Food Network or explore the health advantages of home-cooked meals on Healthline. Let’s make this Halloween both tasty and memorable!
Ingredients for Cheesy Halloween Breadstick Bones
Essential ingredients you’ll need
To whip up your cheesy Halloween breadstick bones, you’ll need the following cornerstone ingredients that bring this spooky treat to life:
- Pre-made pizza dough: This saves time and provides a perfectly chewy texture. You can find it in the refrigerated aisle of your local grocery store.
- Shredded mozzarella cheese: Go for the good stuff! Fresh mozzarella melts beautifully and gives that stretchy, cheesy goodness.
- Turkey bacon: A flavorful, healthier alternative to traditional bacon. Chop it up to add crunch.
- Chicken ham: You can use this to bring a delightful salty-taste, enhancing the overall flavor.
- Garlic powder: A must-have for that savory aroma and taste.
- Parmesan cheese: For that extra umami kick that nobody can resist.
Optional ingredients for customization
The great thing about these cheesy Halloween breadstick bones is that you can customize them to your liking:
- Olive oil: Brush on top before baking for a rich, golden finish.
- Favorite herbs like oregano or basil: Sprinkle these to elevate the flavor profile.
- Spicy pepper flakes: Add a dash if you’re feeling adventurous!
Whether you’re preparing for a Halloween party or just want a fun appetizer, these ingredients will help you nail the experience. Want more tips? Check out the nutritional benefits of garlic in this detailed guide from Healthline. Happy baking!
Step-by-step preparation for Cheesy Halloween Breadstick Bones
Creating Cheesy Halloween Breadstick Bones is not just a treat for your taste buds; it’s an experience that brings the fun of Halloween into your kitchen! Whether you’re hosting a spooky gathering or simply looking for a fun way to spice up your weeknight dinner, these delicious breadsticks are guaranteed to be a hit. Let’s walk through each step together for a simple and enjoyable cooking adventure.
Gather your ingredients
Before diving into the culinary fun, it’s essential to have all your ingredients ready. This not only makes the process smoother but also adds to the excitement. Here’s what you’ll need:
- Pizza dough (store-bought or homemade works well)
- Mozzarella cheese (shredded)
- Garlic powder (for flavor)
- Italian seasoning (optional)
- Olive oil (for brushing)
- Turkey bacon or chicken ham (optional, for extra flavor)
- Salt and pepper (to taste)
Feel free to get a bit creative with additions! Perhaps some diced jalapeños for a spicy kick? Or even some black olives for those spooky eyes? The possibilities are endless!
Preheat the oven and prepare the baking sheets
Now that you have everything laid out, it’s time to set the stage for your cheesy Halloween adventure. Preheat your oven to 400°F (200°C). A hot oven is key to achieving that perfect golden-brown color. While the oven gets warm, grab your baking sheets and line them with parchment paper. This makes cleanup a breeze and prevents the breadsticks from sticking.
Ensure your kitchen is well-ventilated; this allows the wonderful aromas of baking to waft through your home, creating an inviting atmosphere. Nothing beats the smell of fresh bread!
Portion and shape the pizza dough
Once the oven is preheated, it’s time to get your hands a little floury. Take your pizza dough and divide it into manageable sections. Depending on how large or small you like your breadsticks, aim for pieces about 6 inches long.
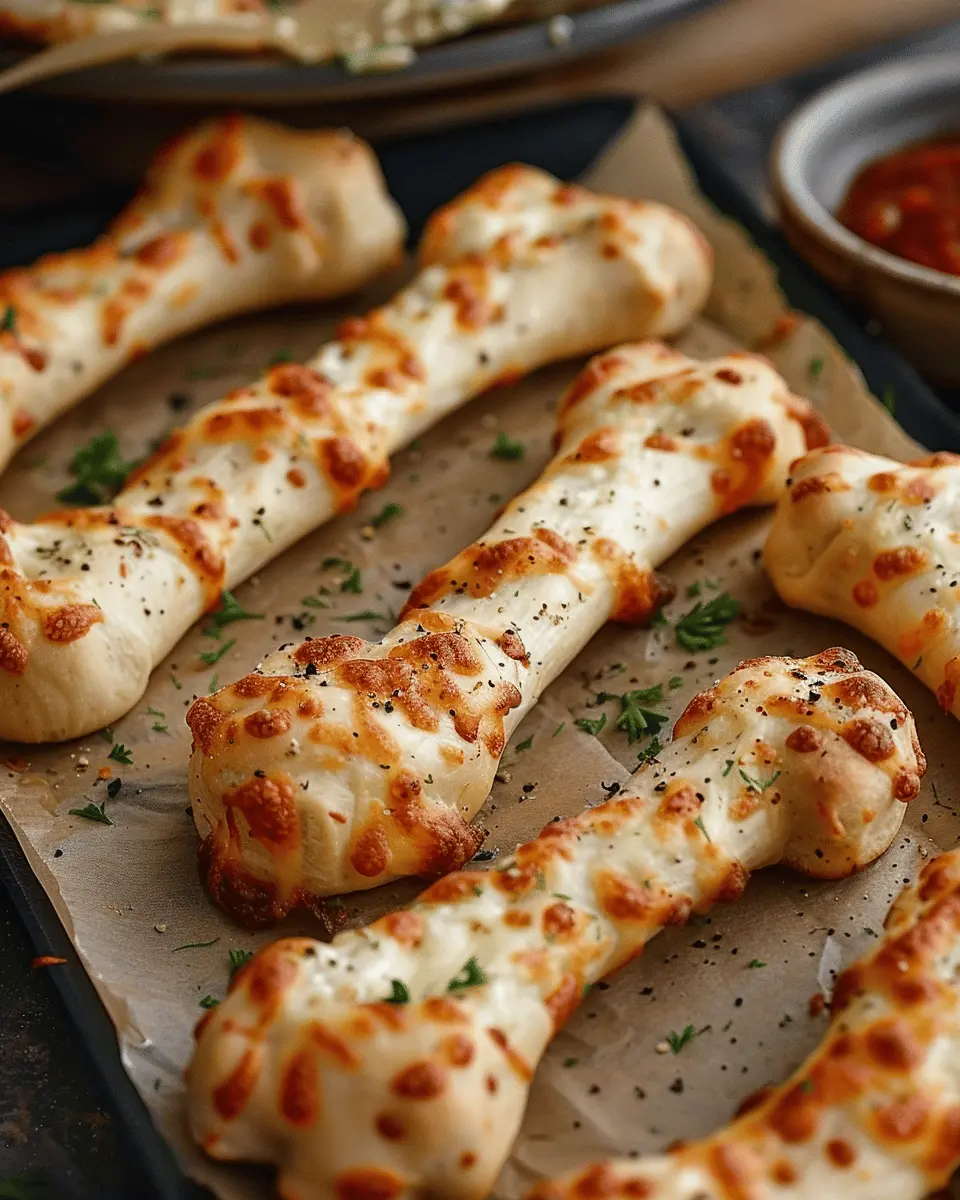
Next, stretch and shape them into bone-like forms. I like to pinch one end to create the “bone” protrusion and gently taper the other end for a nice, authentic appearance. Think of it like sculpting your Halloween masterpiece! If you need some visual inspiration, consider checking out this Baking Techniques Guide.
Brush, sprinkle, and bake for the first phase
Now comes the best part: infusing flavor! Place your shaped dough on the prepared baking sheets. Brush each breadstick with a generous amount of olive oil. This not only helps them brown nicely but also adds a rich taste. Sprinkle a dash of garlic powder and Italian seasoning over the top, then season with salt and pepper as desired.
Bake these spooky sticks in the oven for about 10-12 minutes or until they are golden brown. Keep an eye on them; oven times can vary. When they emerge, they should look delightfully crispy, but we’re not done just yet!
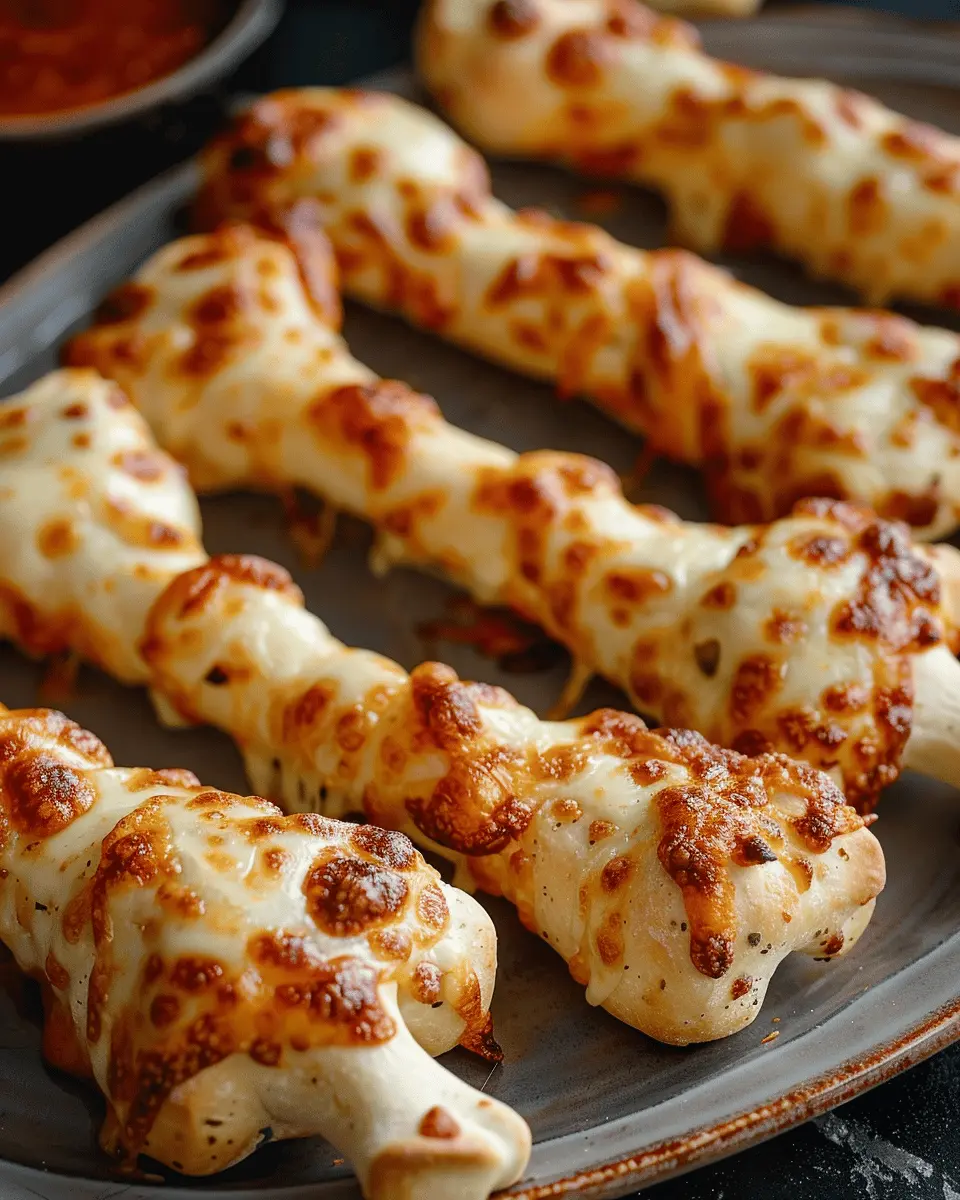
Add the mozzarella and bake until bubbly
This is where the magic happens! Once your cheesy Halloween breadstick bones are slightly cooled but still warm, sprinkle them with the shredded mozzarella cheese. Don’t be shy; the gooier, the better! If you’re feeling adventurous, consider adding a few bits of turkey bacon or chicken ham here, turning your breadsticks into little flavor bombs.
Pop them back in the oven for an additional 5-7 minutes, or until the cheese is beautifully melted and bubbling. Picture this: pulling them out of the oven, the cheese stretching as you lift one. It’s a sight that will have everyone at the table drooling in anticipation!
Each step of this process has its own charm, and I hope you enjoy the journey as much as the destination—the Cheesy Halloween Breadstick Bones are well worth the effort! So turn on your favorite Halloween playlist, gather your friends or family, and enjoy the joyous chaos of cooking together. Happy baking!

Variations on Cheesy Halloween Breadstick Bones
Spooky Garlic Breadstick Bones
Looking to take your cheesy Halloween breadstick bones to the next level? One delicious twist is to add garlic butter. Simply melt some butter, mix in minced garlic, and brush it over your shaped breadstick bones before baking. Not only does it create an inviting aroma, but it also adds a rich depth of flavor that pairs perfectly with any savory dip. For a zesty kick, sprinkle some crushed red pepper flakes or fresh parsley on top after they come out of the oven. The result? A treat that’s not only spooky but also scrumptiously savory.
For a fun pairing, consider serving these garlic breadstick bones with marinara sauce or a homemade ranch dip. Did you know that 70% of people prefer dipping their breadsticks? It’s a great way to get your guests involved in this Halloween feast!
Sweet Halloween-Themed Breadsticks
Want something to satisfy your sweet tooth? Transform your cheesy Halloween breadstick bones into delightful dessert sticks! By using a sugar cookie dough base instead of traditional bread dough, you can create a fun, festive treat. Shape the dough into bones and sprinkle a mixture of cinnamon and sugar on top before baking. To elevate the sweetness, dip them in chocolate or drizzle with icing after they cool.
These sweet variations can be perfect for any Halloween gathering or party. Imagine serving them alongside a bowl of warm caramel or a pumpkin spice dip. It’s an eye-catching way to celebrate the season! If you’re looking for more sweet ideas, check out this article on Halloween treats for a variety of options.
Whether you stick with the classic cheesy flavor or venture into new territory with these variations, your Halloween gathering is sure to be a hit!
Cooking tips and notes for Cheesy Halloween Breadstick Bones
Ensuring the perfect texture
To achieve the ideal texture for your cheesy Halloween breadstick bones, it’s crucial to follow the dough preparation closely. Make sure to use warm water to activate the yeast — too hot can kill it, while too cold won’t wake it up. Knead the dough until it feels elastic but not sticky; this usually takes about 5-7 minutes. If you’re feeling adventurous, you might consider adding some garlic powder or Italian herbs to the dough for an extra flavor kick!
Ideas for making cleanup a breeze
Cleaning up after a fun cooking session should be as easy as eating your Halloween treats!
- Use parchment paper on your baking sheets. Not only does this prevent sticking, but it also makes for easy removal and disposal.
- Soak utensils immediately after use. A quick soak in warm, soapy water can save you time scrubbing later.
- Prepare a space near your cooking area for easy organization of ingredients. Keeping everything in one spot can minimize mess and confusion.
For more tips on maximizing kitchen efficiency, check out resources like The Spruce and FoodNetwork, both of which offer stellar kitchen hacks.
With these tips in mind, your Halloween baking adventure will be a delightful and mess-free experience!

Serving suggestions for Cheesy Halloween Breadstick Bones
Pairing with Favorite Dips
When you’re making these cheesy Halloween breadstick bones, think about transforming them into a centerpiece for your Halloween gathering. Dipping sauces can elevate the experience. Consider:
- Marinara Sauce: A classic choice that mimics the look of “blood,” adding a spooky twist.
- Garlic Butter: Perfect for garlic lovers, this adds a rich flavor that complements the cheese beautifully.
- Ranch Dressing: This cool, creamy dip offers a tasty contrast to the cheesy warmth of the breadsticks.
For a unique twist, try pairing with pumpkin-spiced hummus for a seasonal touch—exploring new flavor profiles enhances your Halloween celebrations!
Fun Presentation Ideas for Halloween
Presentation can make a simple snack feel extra festive. Here are some fun ways to showcase your cheesy Halloween breadstick bones:
- Spooky Platter: Arrange the breadsticks in the shape of a skeleton on a spooky black platter, and surround them with plastic spiders or googly-eyed decorations.
- Creepy Containers: Use mini cauldrons or skull-shaped bowls for dips to tie in with the Halloween theme.
- Personalized Tags: Label each dip with fun names like “Witches’ Brew Marinara” to engage guests and spark conversations.
With these ideas, your cheesy Halloween breadstick bones will not only taste delicious but also add a festive flair to your Halloween festivities! Consider checking out more serving ideas and recipes on sites like Food Network or AllRecipes for additional inspiration.
Time breakdown for Cheesy Halloween Breadstick Bones
Preparation Time
Getting ready to make your cheesy Halloween breadstick bones is a breeze. You’ll need around 15 minutes to gather your ingredients and shape those spooky skeletons. Don’t worry if you’ve never molded dough into bones before; it’s fun and super easy! If you’re looking for tips on dough handling, King Arthur Baking has some great advice.
Cooking Time
Once your creations are shaped and ready to go, they’ll bake in the oven for about 12-15 minutes. Keep an eye on them to ensure they reach that perfect golden brown!
Total Time
In total, you’re looking at around 30 minutes from start to finish! This makes your cheesy Halloween breadstick bones a fantastic last-minute treat that’s sure to impress your friends at any Halloween gathering. Quick, fun, and utterly delectable—what’s not to love?
Nutritional Facts for Cheesy Halloween Breadstick Bones
Calories per Serving
When it comes to fun Halloween treats, Cheesy Halloween Breadstick Bones keep your taste buds satisfied without derailing your diet. Each breadstick bone clocks in at approximately 150 calories per serving, making them a guilt-free indulgence for your spooky gatherings.
Macronutrient Breakdown
Understanding the macronutrient profile helps you enjoy these delicious snacks responsibly. Here’s what you can expect per serving:
- Carbohydrates: 20g
- Protein: 6g
- Fat: 5g
These nutritious breadstick bones combine hearty carbs, savory protein, and just the right amount of fat, ensuring you have the energy needed for Halloween festivities. Want to know more about satisfying snacks? Check out resources on healthy eating or nutrition basics.
These delightful treat-shaped bones aren’t just fun, they’re a source of energy, perfect for keeping your Halloween spirit high!
FAQs about Cheesy Halloween Breadstick Bones
Can I use store-bought pizza dough?
Absolutely! Using store-bought pizza dough is a huge time-saver and can still yield deliciously spooky cheesy Halloween breadstick bones. Many grocery stores offer fresh or frozen dough that you can easily roll out and shape. If you choose this route, just be sure to follow the package instructions for optimal baking times. If you feel ambitious, however, homemade dough can add that personal touch!
How can I make these breadsticks gluten-free?
Making these tasty breadsticks gluten-free is simpler than you might think! All you need is to substitute regular pizza dough with a gluten-free flour blend. Store-bought gluten-free dough is available and often yields great results. Opt for a high-quality blend for the best texture, and consider adding cheese to enhance its flavor. Always check labels to confirm that all ingredients comply with your dietary needs.
What’s the best way to store leftovers?
If you happen to have any remnants of your cheesy Halloween breadstick bones (which is a rarity in my house), storing them properly is key for keeping them fresh. Place the cooled breadsticks in an airtight container. They can be stored in the refrigerator for up to three days. For longer storage, you can freeze them! Just make sure to wrap them tightly in plastic wrap and then place them in a freezer bag. When you’re ready to enjoy them again, simply reheat in the oven—nothing beats freshly warmed cheese!
For more tips on dough options, check out resources from the Gluten Free Society for insightful advice and recipes. Got more questions? Don’t hesitate to reach out or drop a comment!
Conclusion on Cheesy Halloween Breadstick Bones
Recap of the fun and flavor
Looking back at our Cheesy Halloween Breadstick Bones, it’s clear that these delightful treats are all about blending fun with flavor. The perfect combination of our cheesy breadsticks and zesty seasonings creates not just a delicious snack, but an engaging experience for you and your guests. They’re an innovative way to elevate your Halloween festivities, making your gatherings memorable and exciting.
Encouragement to try making them at home
If you’ve never made themed snacks, this is your chance to shine! Give these cheesy Halloween breadstick bones a try in your own kitchen. They’ll not only impress your friends but also let you unleash your creativity. Cooking is all about exploration, so why not add a spooky twist this season? Whether it’s a gathering or a family night in, these bones are sure to steal the show! For more inspiration, check out this fun cooking guide to keep your culinary adventures going strong.
PrintCheesy Halloween Breadstick Bones: Easy and Fun Family Treats

Enjoy making these spooky Cheesy Halloween Breadstick Bones with your family for a fun and festive treat.
- Prep Time: 15 minutes
- Cook Time: 15 minutes
- Total Time: 30 minutes
- Yield: 24 breadsticks
- Category: Snacks
- Method: Baking
- Cuisine: American
- Diet: Vegetarian
Ingredients
- 1 package breadstick dough
- 1 cup shredded mozzarella cheese
- 1 tablespoon Italian seasoning
- 1 egg, beaten
- 1 tablespoon garlic powder
Instructions
- Preheat your oven to 375°F (190°C).
- Roll out the breadstick dough and cut into bone shapes.
- Brush with beaten egg and sprinkle with garlic powder.
- Sprinkle shredded mozzarella and Italian seasoning on top.
- Bake for 12-15 minutes or until golden brown.
Notes
- For extra flavor, add a pinch of salt to the cheese mixture.
- These can be served with marinara sauce for dipping.
Nutrition
- Serving Size: 2 breadsticks
- Calories: 150
- Sugar: 1g
- Sodium: 300mg
- Fat: 8g
- Saturated Fat: 4g
- Unsaturated Fat: 2g
- Trans Fat: 0g
- Carbohydrates: 15g
- Fiber: 1g
- Protein: 5g
- Cholesterol: 30mg