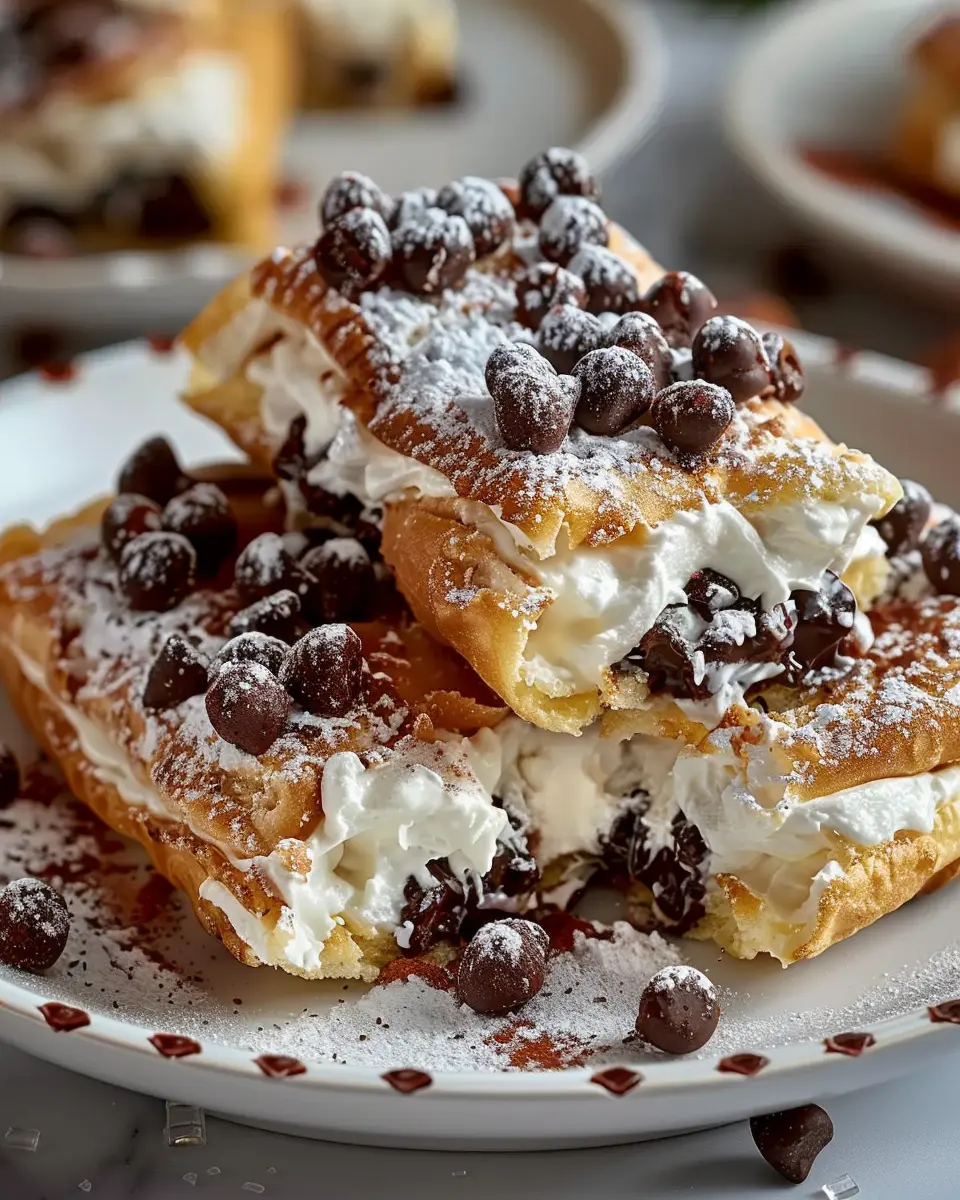
Introduction to Classic Cannoli Squares
When you’re balancing a career and personal life, finding the time to whip up delicious desserts can be challenging. Enter classic cannoli squares—the perfect solution for young professionals looking to impress without the fuss. These delightful squares capture the rich flavors of traditional Italian cannoli in a streamlined, easy-to-make format that suits your busy lifestyle.
Why Classic Cannoli Squares Are a Game-Changer for Young Professionals
Imagine coming home after a long day, and instead of settling for another mediocre dessert, you treat yourself and your friends to a homemade dessert that’s sure to wow—without spending hours in the kitchen. Classic cannoli squares offer a beautiful, minimal effort, while still providing that lush, creamy filling and satisfying crunch that cannoli lovers crave.
Speed and Convenience
One of the best things about these squares is how quickly they come together. With some basic ingredients like ricotta cheese, powdered sugar, and pastry dough, you can make this dessert in under an hour. Ideal for busy weeknights or last-minute gatherings!
Versatility at Its Best
The flavor possibilities are practically endless. From classic chocolate chip to vibrant citrus infusions, these squares can be customized to suit your personal palate or whatever you have in your pantry—making them a go-to dessert for any occasion.
A Social Dessert
They’re not just almost effortless to make; they’re also perfect for sharing! Bring them to your next office party or potluck, and watch as your colleagues flock to your dessert dish—this can be a great way to make connections and build camaraderie with coworkers.
For those who are just starting their culinary journey or want a fun weekend project, check out Epicurious for a variety of tips on dessert-making. And, for inspiration on flavor combinations, Food Network never disappoints with its creative recipes.
In summary, classic cannoli squares are the perfect answer for busy young professionals who still want to enjoy and share sweet culinary creations without the extra time and stress. Your next sweet adventure begins here!
Ingredients for Classic Cannoli Squares
Key ingredients for the filling
The heart of your classic cannoli squares lies in the creamy filling. To get that rich and delightful flavor, you’ll need:
- Ricotta cheese: This is the traditional base that gives your filling its smooth texture.
- Powdered sugar: For sweetness without the grit; it blends seamlessly.
- Vanilla extract: Just a dash enhances the flavor beautifully.
- Chocolate chips: These add a delightful crunch and bursts of sweet chocolate flavor.
If you want to take it one step further, consider adding some zest from an orange or lemon for a refreshing twist.
What you need for the crust
Creating a crispy, buttery crust is essential. Gather these ingredients for a foundation that complements your filling perfectly:
- All-purpose flour: The main component for that perfect texture.
- Butter: Unsalted for a rich flavor.
- Granulated sugar: A little sweetness goes a long way.
- Salt: Just a pinch to bring it all together.
This golden crust harmonizes beautifully with the creamy center.
Optional garnishes to elevate your dish
While your classic cannoli squares are delicious as they are, a few garnishes can really elevate your dish:
- Chopped pistachios: For a nutty flavor and a pop of color.
- Maraschino cherries: They add a nice, sweet touch.
- Powdered sugar: A light dusting right before serving emphasizes the elegance.
These garnishes not only enhance flavor but also add appealing visual elements to your dessert.
For more culinary inspiration, consider checking out resources like the America’s Test Kitchen for variations on traditional recipes.
Step-by-Step Preparation of Classic Cannoli Squares
Making classic cannoli squares isn’t just about enjoying a delicious dessert; it’s about the joy of preparing something special from scratch. Let’s walk through each step, making sure you have everything you need for a delightful baking experience.
Prepare the Cannoli Filling
Start by whipping up the cannoli filling, the heart and soul of your squares. You’ll need:
- 15 ounces of ricotta cheese
- 1 cup of powdered sugar
- 1 teaspoon of vanilla extract
- ½ teaspoon of cinnamon
- ½ cup of mini chocolate chips
- Zest from 1 orange (optional)
- In a mixing bowl, combine the ricotta cheese, powdered sugar, vanilla extract, and cinnamon.
- Beat until smooth and creamy; you want a rich texture that melts in your mouth.
- Gently fold in the mini chocolate chips and orange zest for that extra zing.
- Once mixed well, let it chill in the refrigerator. This step is crucial as it allows the flavors to meld beautifully.
Preheat the Oven for Optimal Baking
While the filling is chilling, take a moment to preheat your oven to 375°F (190°C). Preheating is essential for achieving that golden-brown crust that we all adore. A hot oven ensures the pastry bakes evenly, so don’t rush this step!
Roll Out the Pie Crust
For this dish, we will use a store-bought pie crust for convenience, but feel free to make your own if you’re feeling adventurous.
- On a lightly floured surface, roll out the pie crust until it’s about ¼ inch thick.
- Cut the rolled crust into squares, roughly 5 inches by 5 inches. You’ll need enough squares for both the bottom and top layers.
Add the Creamy Filling
Once you have your squares ready, it’s time to fill them!
- Place half of the pie squares onto a parchment-lined baking sheet.
- Spoon a generous amount of your chilled cannoli filling onto each square, leaving some space around the edges.
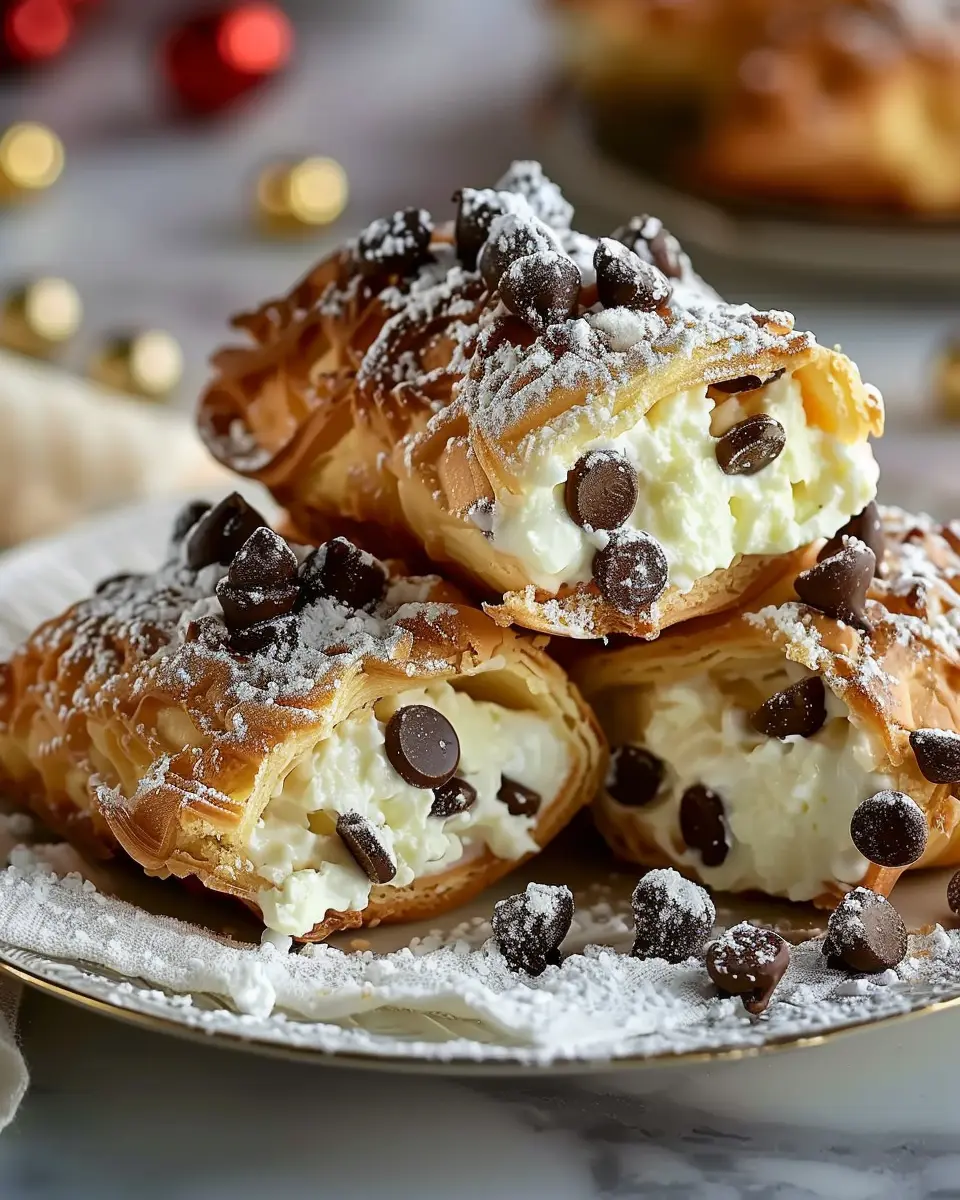
- Top with another pie square to create a sandwich. Press the edges gently to seal. Feeling unsure? You can use a fork to crimp the edges for that classic pie look!
Prepare the Top Crust and Egg Wash
To achieve a beautiful golden finish on your classic cannoli squares, preparing an egg wash is essential.
- In a small bowl, whisk one egg with a tablespoon of water.
- Brush this mixture generously over the top of each square. This will give them that lovely sheen and color during baking.
Bake to Perfection
Now, it’s time to slide those delicious squares into the preheated oven!
- Bake for about 20-25 minutes or until golden brown. Keep an eye on them around the 20-minute mark to ensure they don’t brown too much.
- The aroma will fill your kitchen, providing an irresistible signal that something delightful is in the works.
Cooling and Cutting the Squares
Patience is key here! Once they’re out of the oven, you’ll need to let your classic cannoli squares cool.
- Allow them to rest on the baking sheet for about 10 minutes before moving them to a wire rack. This step helps them set properly.
- Once completely cooled, use a sharp knife to cut them into squares or rectangles.
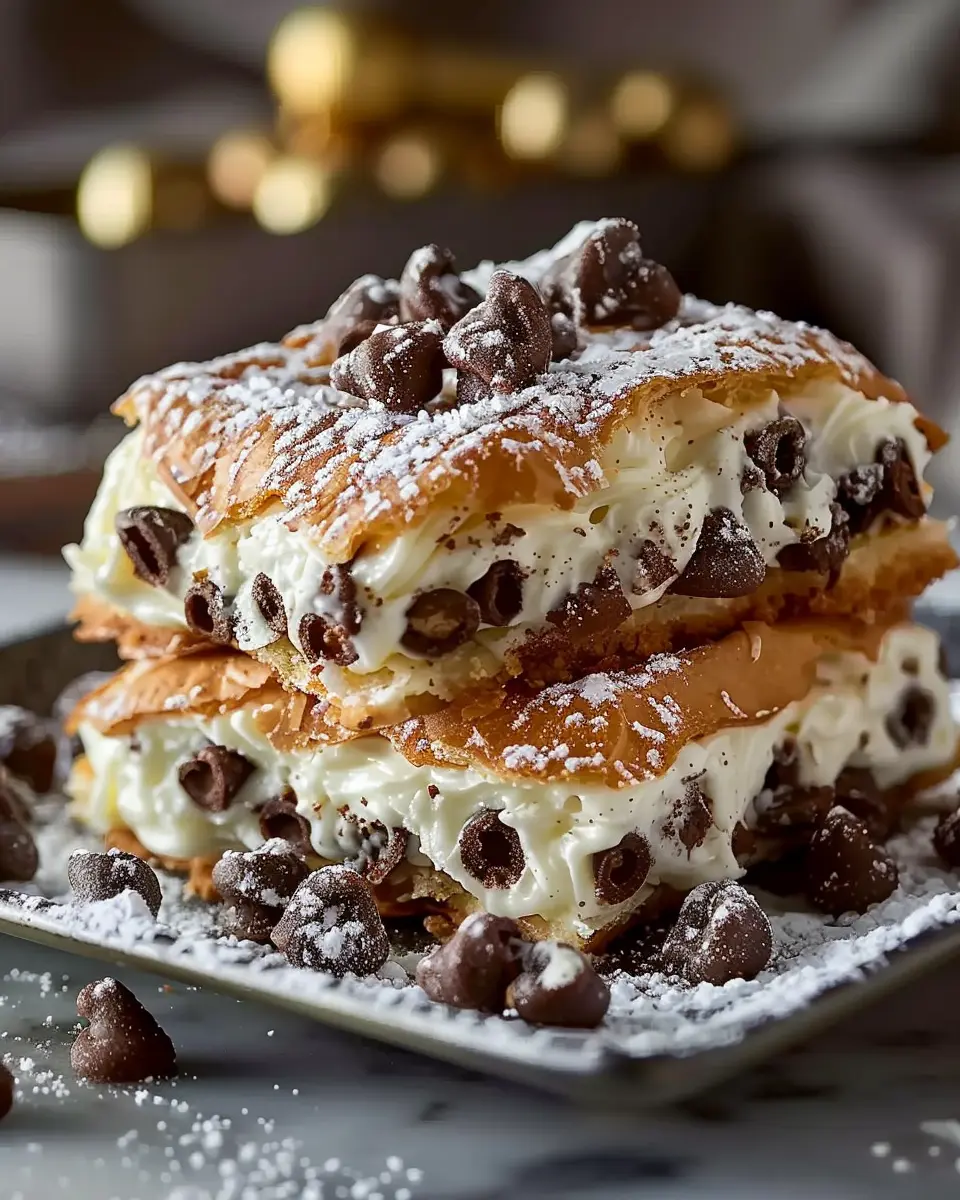
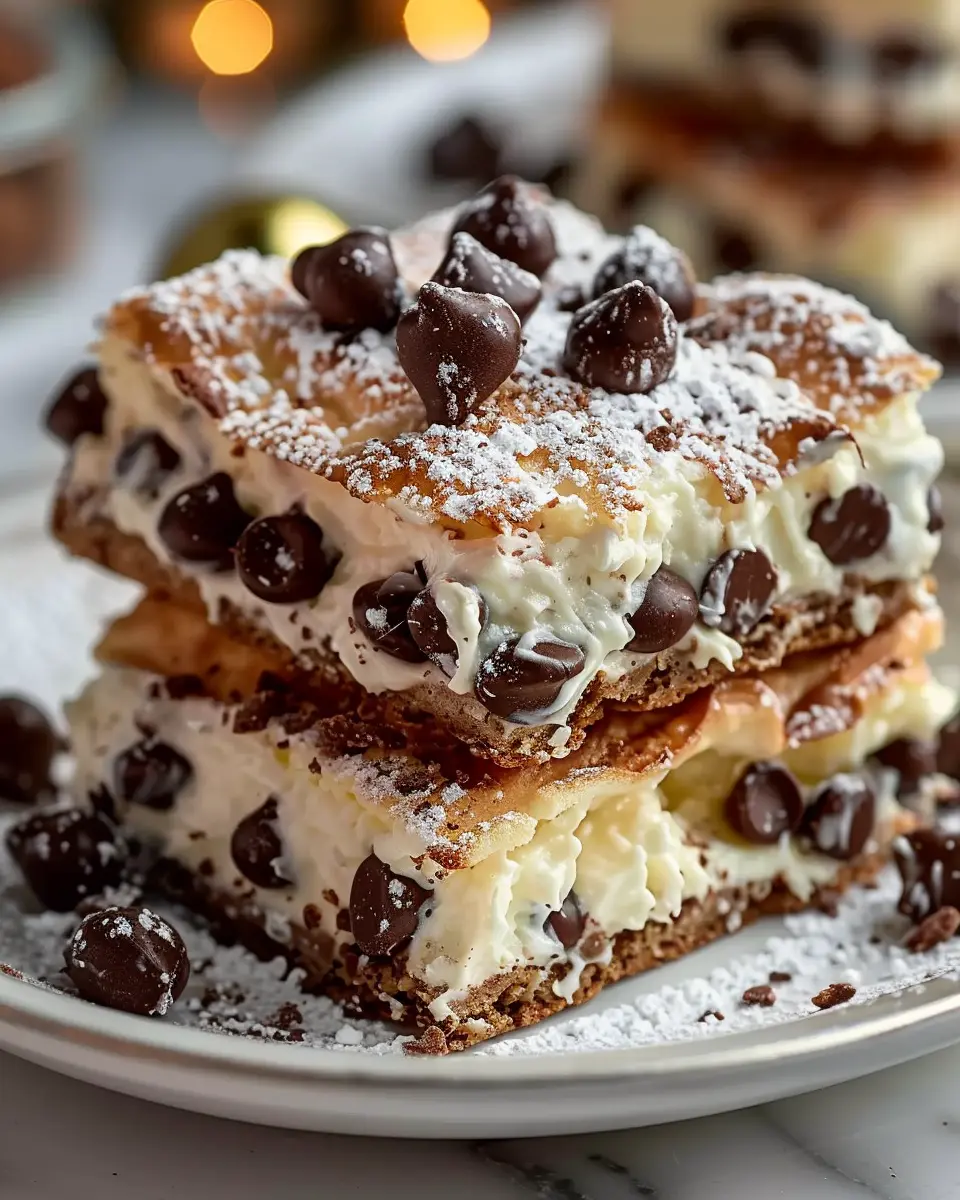
Finally, dust with powdered sugar for a lovely presentation and serve these delightful treats to your friends and family, or keep them all to yourself; we won’t judge!
Baking classic cannoli squares can be a fun activity, especially on weekends when you have more time to enjoy the process. Share your creations on social media, and for further inspiration, check this individual cannoli recipe for traditional fillings and methods.
Variations on Classic Cannoli Squares
When it comes to classic cannoli squares, the sky’s the limit with creativity! These delightful treats are already a crowd-pleaser, but why not take them a step further? Here are two fun variations that bring an unexpected twist to this Italian favorite.
Fruity Twist: Adding Fresh Berries
For a refreshing change, consider incorporating fresh berries into your classic cannoli squares. Strawberries, blueberries, and raspberries not only add vibrant color but also bring a burst of juicy flavor that perfectly balances the creamy filling. Simply fold your choice of berries into the ricotta mixture, or arrange them on top for a beautiful presentation. Not only do these berries enhance the appearance, but they also provide a sweet-tart contrast that complements the rich creaminess of the cannoli.
If you’re curious about the nutritional benefits, berries are rich in antioxidants, fibers, and vitamins. For more ideas on incorporating fruits into desserts, check out this resource on the benefits of berries.
Chocolate Lovers: Double Chocolate Cannoli Squares
If indulgence is what you’re after, try making double chocolate cannoli squares. Start by mixing cocoa powder into the ricotta filling for an ultra-chocolaty experience. You can also add mini chocolate chips to the filling for a delightful surprise in every bite. Finally, consider drizzling melted chocolate over the top before serving for an elegant finish. This variation is perfect for chocolate enthusiasts who can never have enough!
These two variations on classic cannoli squares are sure to impress your friends and family at your next gathering—so why not give them a try? With just a bit of creativity, you can turn a traditional favorite into something uniquely yours!
Cooking Tips and Notes for Classic Cannoli Squares
Best practices for achieving a flaky crust
Achieving a perfectly flaky crust for your classic cannoli squares can elevate your dessert from good to exceptional. Here are some tips to ensure your crust turns out just right:
- Keep It Cold: Ensure your butter is cold, as this helps create those delightful flaky layers. You can even chill your flour for added effect.
- Don’t Overwork the Dough: When mixing, be gentle and avoid overworking it, which can lead to a tough texture. Just mix until the ingredients come together.
- Roll It Thin: Aim for a thin roll—about 1/8 inch thick. This allows the crust to cook evenly and achieve that perfect crunch.
For more detailed pastry techniques, check out this resource from King Arthur Baking.
Tips for a creamy filling
The filling is perhaps the star of your classic cannoli squares. To create that ideal creamy texture, follow these tips:
- Use Whole Ricotta: For that luscious creaminess, opt for whole ricotta cheese. It’s richer and provides better flavor than lower-fat versions.
- Strain the Ricotta: If your ricotta has excess moisture, strain it through cheesecloth for a few hours to avoid a watery filling.
- Flavor It Up: Incorporate a splash of vanilla extract and a pinch of cinnamon for depth. A dash of citrus zest can brighten up the flavors, too.
Feel free to experiment, as the classic cannoli squares are versatile and completely customizable to your taste!
Serving Suggestions for Classic Cannoli Squares
Pairing Ideas for a Delightful Presentation
Elevate your classic cannoli squares by complementing them with fresh flavors. Consider serving these indulgent treats alongside a dollop of whipped cream or a drizzle of chocolate sauce for a decadent touch. Fresh berries also make a perfect pairing; strawberries and raspberries not only taste delightful but also add a pop of color. For a refreshing contrast, try pairing your dessert with a light herbal tea or a rich coffee.
Creating a Dessert Platter for Gatherings
If you’re looking to impress guests at your next gathering, presenting your classic cannoli squares as part of a dessert platter is a fantastic idea. Combine them with an assortment of treats like mini cheesecakes, cookie bites, and fruit tarts to create visual and flavorful variety. Use a large, decorative board or platter, and arrange the squares in neat rows intermixed with the other desserts. Don’t forget to garnish the platter with fresh mint leaves for that extra touch of elegance!
For dessert-plating inspiration, check out resources like The Spruce Eats and explore creative ways to arrange your treats.
Time Breakdown for Classic Cannoli Squares
When you’re gearing up to create delicious classic cannoli squares, knowing how much time you’ll need is essential. Let’s break it down:
Preparation Time
Getting all your ingredients together and whipping up the filling takes about 20 minutes. It’s the perfect opportunity to enjoy a podcast or energize with some upbeat music as you cream the ricotta and sugar!
Baking Time
Once your squares are assembled and ready to go, pop them in the oven for about 30-35 minutes. The lovely aroma will have your neighbors peeking in to see what’s cooking!
Total Time
From start to finish, expect to spend around 55-60 minutes. That’s a quick and rewarding investment for such a decadent dessert. Plus, you can impress friends and family with these classic cannoli squares in no time!
For more tips on homemade desserts, check out the Pioneer Woman for inspiration.
Nutritional Facts for Classic Cannoli Squares
Calories per serving
When indulging in classic cannoli squares, it’s helpful to know what you’re enjoying. Each delightful square contains approximately 150 calories. This makes them a perfect treat for those moments when you want to satisfy your sweet tooth without going overboard.
Key nutrients
These squares aren’t just about the delicious taste—they also offer key nutrients that can benefit your snack game.
- Carbohydrates: About 20g, providing energy.
- Protein: Roughly 3g, great for muscle repair.
- Fat: Around 7g, which includes healthy fats from ricotta cheese.
In balance, pairing your classic cannoli squares with a side of fresh fruit can help enhance the nutritional value of your snack. For more insights on proper portion sizes and ingredient substitutions, you can check out articles from trusted sources like the USDA Dietary Guidelines or Healthline to elevate your dessert experience.
FAQs about Classic Cannoli Squares
Can I use different types of cheese for the filling?
Absolutely! While traditional classic cannoli squares use ricotta cheese for their creamy filling, feel free to play around with other cheeses. Mascarpone lends a rich, velvety texture, while cream cheese can add a delightful tanginess. Just keep in mind that using a mix of cheeses can enhance the flavor—many home bakers swear by a combination of ricotta and mascarpone for the best outcome.
How to store leftover Cannoli Squares?
Storing your classic cannoli squares is simple! After enjoying your delicious dessert, make sure they’re stored in an airtight container. Keep them in the refrigerator, and they’ll stay fresh for about 3-4 days. If you notice the crust getting too soft over time, consider enjoying the filling and crust separately—this way, you can maintain that perfect texture.
Can I make these squares ahead of time?
Definitely! If you’re prepping for an event or just want to enjoy some treats later, classic cannoli squares are ideal for making ahead. You can prepare them a day in advance; just store them in the fridge. If possible, layer the filling closer to serving time to prevent the crust from becoming soggy. This dish is perfect for gatherings, as it allows you to enjoy the celebration without being stuck in the kitchen!
For more inspiring recipes and tips on Italian desserts, check out sources like Serious Eats or Bon Appétit for additional insights. Enjoy your baking adventure!
Conclusion on Classic Cannoli Squares
A Final Note on Embracing Homemade Goodness
There’s something special about creating your own classic cannoli squares. Beyond the satisfaction of a job well done, you embrace the essence of homemade goodness—rich flavors and the warmth of tradition. These delightful treats not only bring a taste of Italy to your kitchen but also encourage creativity. Don’t hesitate to experiment with fillings or toppings to suit your preference; after all, cooking is all about personal flair.
By making your cannoli squares from scratch, you’re crafting not just a dessert, but also lasting memories. So gather your friends, share your creations, and enjoy the sweetness of homemade desserts together. Check out sources like Food Network for more fun tips and inspiration.
PrintClassic Cannoli Squares: Easy Indulgence for Your Sweet Cravings
Indulge in these rich and creamy classic cannoli squares, a delightful twist on the traditional Italian dessert.
- Prep Time: 20 minutes
- Total Time: 4 hours 20 minutes
- Yield: 8 servings
- Category: Dessert
- Method: No-Bake
- Cuisine: Italian
- Diet: Vegetarian
Ingredients
- 1 cup ricotta cheese
- 1 cup mascarpone cheese
- 1/2 cup powdered sugar
- 1 teaspoon vanilla extract
- 1/2 teaspoon cinnamon
- 1 cup graham cracker crumbs
- 1/4 cup unsweetened cocoa powder
- 1/2 cup mini chocolate chips
- 1/2 cup heavy cream
Instructions
- In a mixing bowl, combine ricotta cheese, mascarpone cheese, powdered sugar, vanilla extract, and cinnamon. Mix until smooth.
- In a separate bowl, combine graham cracker crumbs and cocoa powder.
- Layer half of the graham cracker mixture in a square baking dish.
- Spread half of the cheese mixture over the crumbs.
- Sprinkle with half of the mini chocolate chips.
- Repeat layers with the remaining ingredients.
- Refrigerate for at least 4 hours or overnight before serving.
Notes
- For a richer flavor, add a splash of orange zest to the cheese mixture.
- You can use store-bought cannoli shells for a crunchier texture on top.
Nutrition
- Serving Size: 1 square
- Calories: 250
- Sugar: 18g
- Sodium: 45mg
- Fat: 15g
- Saturated Fat: 9g
- Unsaturated Fat: 5g
- Trans Fat: 0g
- Carbohydrates: 26g
- Fiber: 1g
- Protein: 4g
- Cholesterol: 30mg