Introduction to Christmas Bars
The joy of homemade holiday treats
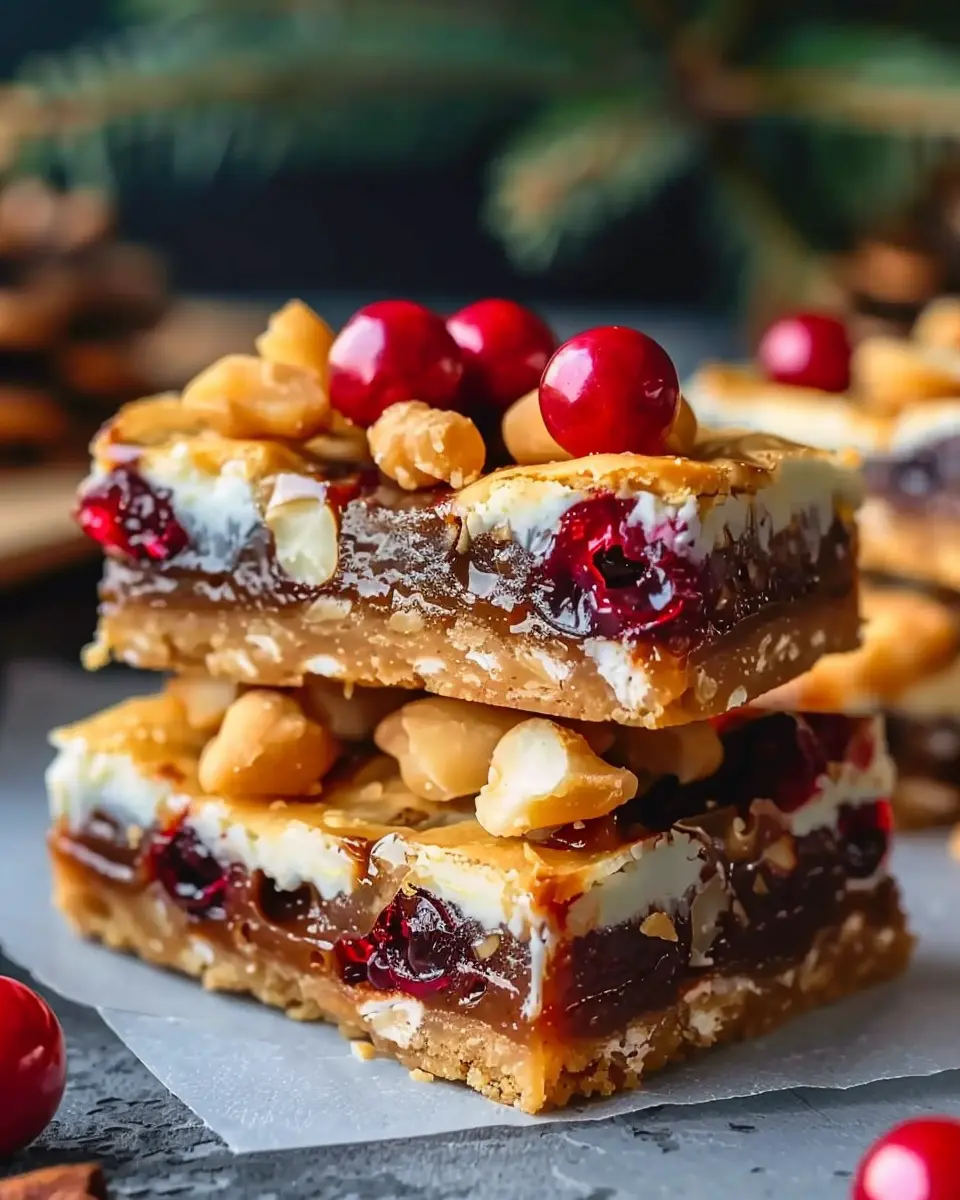
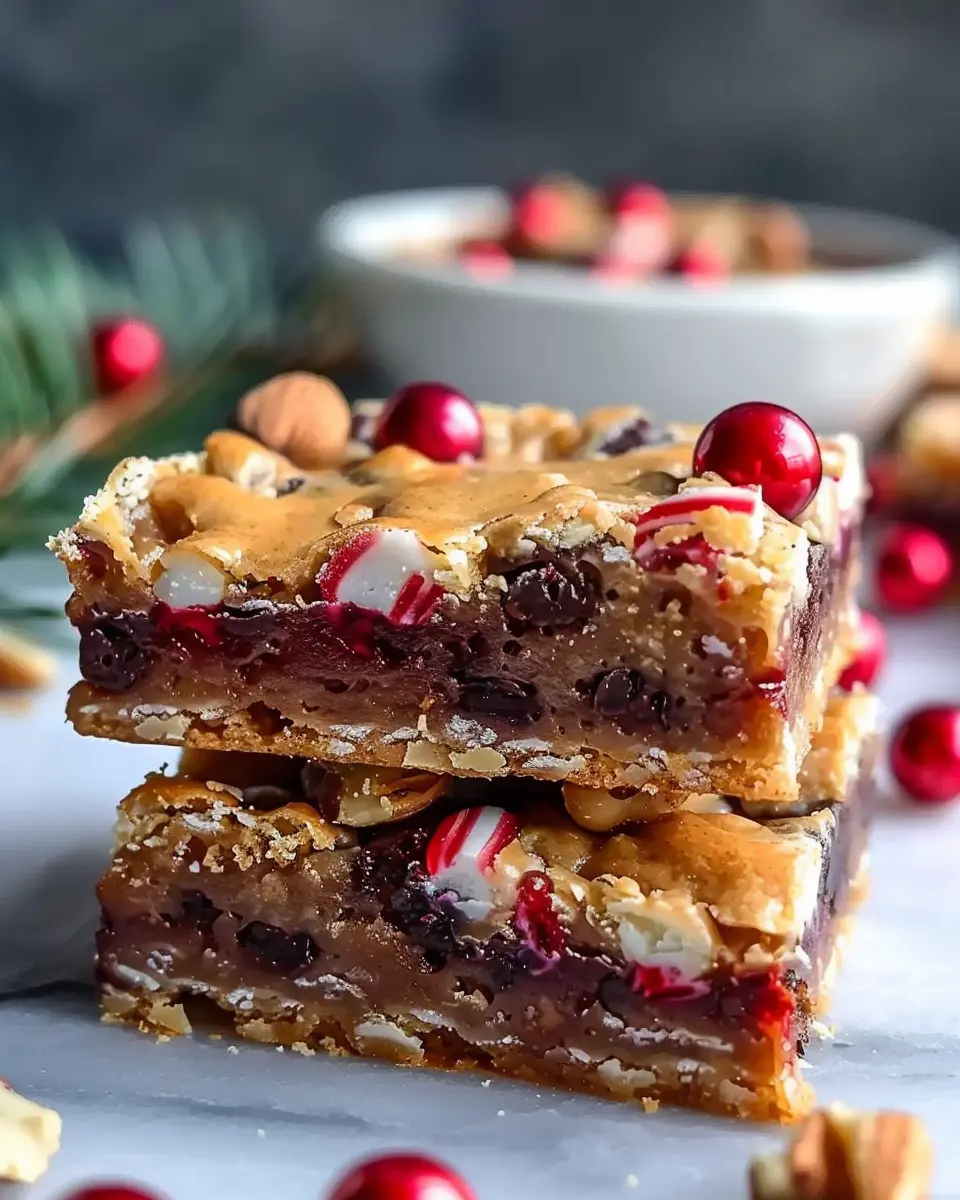
There’s something magical about the holiday season. The scent of spices, the twinkle of lights, and, of course, the treats that come along with it! One of my favorite ways to celebrate the spirit of Christmas is by baking up a storm. Homemade goodies, particularly Christmas bars, bring a warmth that store-bought cookies just can’t replicate. Each bite is packed with memories, laughter, and the excitement of sharing something made with love.
When you craft these delectable bars from your own kitchen, you’re not just following a recipe; you’re creating joy. Whether it’s the rich, gooey chocolate or the crunchy nuts mixed with dried fruit, each layer represents a slice of your holiday spirit. Plus, they’re easy to make, which means you can whip up several batches and share them with friends, family, or even colleagues. Who wouldn’t love a homemade treat during this festive time?
Why Christmas bars are a must-try
So why are those Christmas bars a must-try this holiday season? Let’s dig into a few reasons:
- Versatility: You can tailor them to suit everyone’s taste. From peppermint chocolate to gingerbread pecan, there’s a variant for every palate!
- Easy to make: Most recipes require simple ingredients that you likely already have in your pantry. Plus, they require minimal fuss—no cookie-cutter shapes or intricate decorating necessary.
- Great for gifting: When wrapped in festive packaging, these bars make for excellent gifts. Who wouldn’t appreciate a sweet, handmade surprise?
According to a study, baking holiday treats boosts mental well-being, releasing endorphins that help combat seasonal stress. So not only are Christmas bars a delicious addition to your holiday festivities, but they can also lift your spirits during a hectic time.
Ready to dive in? Grab those ingredients, and let’s make your holiday a little sweeter one Christmas bar at a time! For more insights on baking, check the American Heart Association for heart-healthy variations on holiday recipes.
Ingredients for Christmas Bars
Essential Ingredients You Need
When it comes to making Christmas bars, having the right ingredients is key to achieving that delightful festive flavor. Here’s what you’ll need:
- Butter: Softened for a rich base.
- Brown Sugar: Adds that warm, caramel-like sweetness.
- Granulated Sugar: For a balanced sweetness.
- Eggs: Bind all the ingredients together.
- Flour: All-purpose works best for a chewy texture.
- Baking Powder: To help them rise.
- Vanilla Extract: Enhances the flavors wonderfully.
- Chopped Nuts: Walnuts or pecans for added crunch.
- Dried Fruit: Think cranberries or raisins for that holiday vibe.
- Chocolate Chips: A mandatory indulgence!
Possible Substitutes for Dietary Restrictions
Don’t worry if you’re juggling dietary needs; there are plenty of substitutions! If you’re vegan, consider using applesauce or flaxseed meal as an egg replacement. For gluten-free options, gluten-free flour can seamlessly fit in. Need something less sweet? You can reduce the sugar or swap in a natural sweetener like agave syrup.
For more tips on ingredient adjustments, check out The Spruce Eats for comprehensive guides! Whatever your preferences, you can whip up delicious Christmas bars that everyone can enjoy.
Step-by-step Preparation of Christmas Bars
The festive season calls for delightful treats, and nothing embodies the essence of celebration quite like Christmas bars. These delicious treats are perfect for gatherings with friends and family or simply as an indulgent snack during those cozy winter nights. Let’s dive into making your own scrumptious Christmas bars with these straightforward steps.
Preheat the oven
To kick things off, you’ll want to preheat your oven to 350°F (175°C). The right temperature is crucial for achieving that beautifully baked texture. While your oven is warming up, this is also a great time to prepare your baking pan; opt for an 8×8 inch baking dish. Grease it lightly with some cooking spray or line it with parchment paper to avoid any sticky situations later on. Trust me, nothing is more frustrating than having your Christmas bars stick to the pan!
Mix the dry ingredients
Now it’s time to gather your dry ingredients. In a medium-sized bowl, whisk together:
- 1 cup all-purpose flour
- 1/2 cup brown sugar
- 1/2 teaspoon baking powder
- 1/4 teaspoon salt
- 1 tablespoon of cinnamon for that warm, festive flavor
This combination not only lays the foundation for your bars but also fills your kitchen with that wonderful holiday aroma. Make sure you thoroughly mix the dry ingredients so the baking powder is evenly distributed.
Combine wet ingredients
In a separate bowl, it’s time to bring together the wet ingredients. You’ll need:
- 1/2 cup melted butter or a butter substitute if you prefer
- 2 large eggs
- 1 teaspoon vanilla extract
Whisk these together until you achieve a smooth consistency. The melted butter adds richness, while the eggs will help bind everything together. Don’t you love how simple yet profound the magic of baking can be?
Fold in the fun mix-ins
This is where the fun really begins! You can get creative by folding in your favorite mix-ins. Some delightful options include:
- 1/2 cup chopped nuts (like walnuts or pecans)
- 1/2 cup dried cranberries or cherries for that sweet and tart touch
- 1/2 cup chocolate chips—because who doesn’t love chocolate?
Carefully fold these into your batter just until combined. The mix-ins not only enhance the flavor but also elevate the festive vibe of your Christmas bars.
Spread and bake to perfection
Now, it’s time to bring everything together. Pour the combined mixture into your prepared baking dish and spread it evenly with a spatula. The goal is to have an even layer so your Christmas bars bake uniformly. Slide the pan into your preheated oven and let them bake for about 25-30 minutes or until the edges are golden brown and a toothpick comes out clean. Pro tip: Keep a close eye on the timer because those last few minutes can make a big difference!
Cool and cut the bars
Once baked to perfection, remove the pan from the oven and let it cool on a wire rack for about 10-15 minutes. Cooling is essential; cutting into hot bars will only result in a crumbly mess. After they have cooled slightly, take a sharp knife and cut them into squares or rectangles, depending on your preference. To take your Christmas bars to the next level, feel free to dust them with powdered sugar before serving.
Incorporating these steps not only ensures a delightful treat but also turns the cooking process into a cherished memory. So gather your ingredients, put on your favorite holiday playlist, and enjoy the festive experience of creating your very own Christmas bars. Let’s make this season even sweeter!
Variations on Christmas Bars
When it comes to holiday sweets, Christmas bars are a versatile and delicious option that can be customized to reflect your festive spirit. Let’s explore some delightful variations you can try this season!
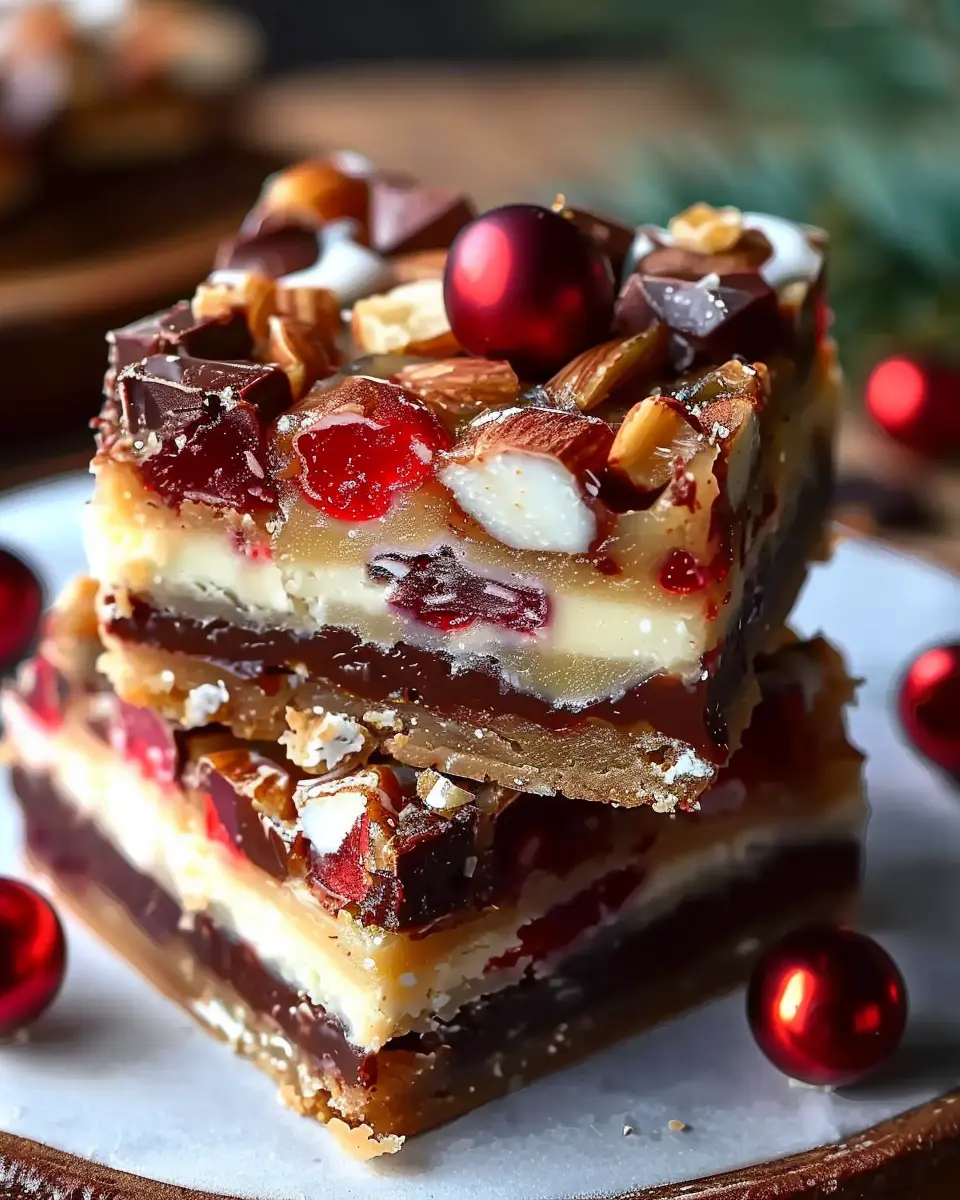
Classic Chocolate Christmas Bars
You can’t go wrong with classic chocolate, and these Christmas bars are no exception. Rich cocoa, a hint of vanilla, and just the right amount of sweetness come together in these indulgent treats. Top with a layer of chocolate ganache or sprinkle with holiday-themed sprinkles for that perfect festive touch.
Ingredients:
- Dark chocolate
- Sweetened condensed milk
- Your choice of nuts (almonds or walnuts work marvelously)
Why not experiment with different chocolate types? Semi-sweet, milk chocolate, or even white chocolate can create a flavor explosion that makes them different every time you bake.
Festive Peppermint Christmas Bars
For those who love a minty twist, peppermint Christmas bars are a must-try. Combining the rich chocolate flavor with peppermint extract and crushed candy canes, these bars truly embody the spirit of the season.
Tips:
- Use crushed candy canes for a delightful crunch.
- Consider drizzling some melted white chocolate on top for a striking contrast.
This combination has become a holiday favorite, bridging the gap between the comforting taste of chocolate and the invigorating burst of peppermint.
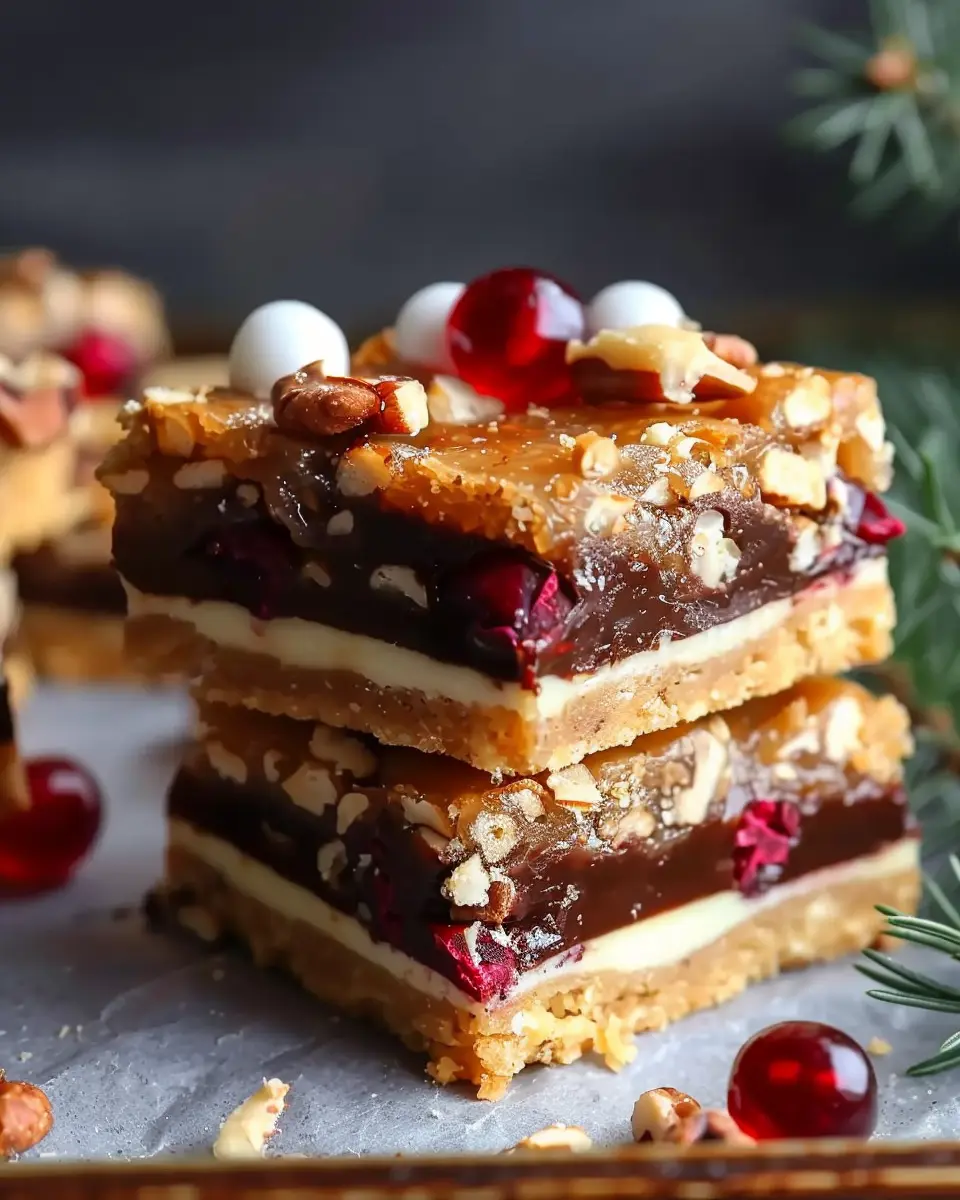
Nutty Holiday Christmas Bars
For a heartier option, nutty holiday Christmas bars can provide that lovely crunchy texture that complements the sweetness. Incorporate your favorite nuts—hazelnuts, pecans, or even a mix for diversity—in a sweet, chewy base.
Why Nuts?
Nuts not only add flavor but also healthy fats and proteins, which can make your desserts feel a little more substantial. Check out the nutritional benefits of nuts on Healthline.
With these variations in your baking arsenal, your holiday celebration will be sweeter than ever! Which flavor will you try first?
Cooking Tips and Notes for Christmas Bars
Ensuring the Perfect Texture
To achieve that glorious chewy yet crisp texture in your Christmas bars, don’t skip the chilling step! After mixing your ingredients, let the mixture rest in the fridge for at least 30 minutes. This helps solidify the fats and provides a delightful bite. If you’re using nuts or dried fruits, chop them finely—this not only ensures an even distribution but also elevates the texture.
Ideas for Storage and Freshness
Once your Christmas bars are made, proper storage is key to maintaining freshness. Here are a few tips you can follow:
- Cooling First: Always let them cool completely before storing. This prevents sogginess.
- Airtight Containers: Use airtight containers to keep them fresh for up to a week. For longer storage, consider freezing them wrapped tightly in plastic wrap followed by foil.
- Thawing Tips: When ready to enjoy, thaw at room temperature. If you want them to taste like fresh out of the oven, reheat them briefly.
For more insights on bar storage, check out The Food Lab. Happy baking!
Serving Suggestions for Christmas Bars
How to Present Your Christmas Bars
Creating a delightful presentation for your Christmas bars can elevate your holiday gatherings. Start by cutting the bars into neat squares or festive shapes. Place them on a decorative platter or a tiered stand for an impressive display. Consider adding some seasonal touches like sprigs of pine or small ornaments around the bars. You could even sprinkle a bit of powdered sugar on top for that snowy effect!
Ideal Beverages to Pair With
When it comes to beverages, think beyond the usual. A warm cup of hot cocoa or spiced apple cider complements the rich flavors of your Christmas bars beautifully. Alternatively, a refreshing sparkling water infused with citrus can provide a delightful contrast. For something a bit more unique, try a cozy chai latte. These options not only enhance the festive spirit but also cater to various taste preferences—after all, everyone deserves a delicious pairing!
For more ideas on festive drinks, you can check out The Spruce Eats.
Time Breakdown for Christmas Bars
Preparation Time
Getting started on your Christmas bars is easy and delightful! You’ll need about 20 minutes to gather your ingredients and mix everything together. As you chop, measure, and blend, think about the joy these treats will bring to your holiday gatherings.
Baking Time
Once your mixture is ready, pop it into the oven and let it bake for 30-35 minutes. You’ll know it’s done when your kitchen is filled with a wonderful aroma that rivals any festive candle. This time is perfect for wrapping gifts or creating holiday decorations!
Total Time Needed
In total, you can whip up these scrumptious Christmas bars in about 60-70 minutes. This leaves you plenty of time to enjoy the moment and maybe even make a festive hot chocolate to sip while waiting. If you’re looking for festive decor ideas, check out sites like Better Homes & Gardens for inspiration!
Remember, these delicious bars are not just another dessert; they’re a slice of holiday cheer that you’ll be proud to share with friends and family. Happy baking!
Nutritional Facts for Christmas Bars
Calories per serving
When indulging in Christmas bars, knowing the calories can help you enjoy them responsibly. Each serving typically contains around 200-250 calories. This means you can savor the delightful flavors without completely derailing your holiday diet!
Key nutritional information
These Christmas bars are not just tasty; they also offer some nutritional benefits. Here’s a quick breakdown:
- Carbohydrates: 25-30g
- Protein: 3-5g
- Fats: 10-15g, primarily from healthy nuts
- Fiber: 2-3g
The nuts and dried fruits in the bars provide essential vitamins and minerals. For a balanced treat, consider pairing them with a cup of herbal tea or a warm beverage of your choice to complement the flavors. For research on the nutritional advantages of nuts, check out Healthline’s article.
Ultimately, enjoying a Christmas bar is about balance. So, go ahead and treat yourself—they’re a festive addition that’s worth it!
FAQs about Christmas Bars
How can I make my Christmas bars more festive?
Want to elevate your Christmas bars to festive heights? Here are some creative ideas:
- Add Festive Toppings: Consider using crushed peppermint candy canes, a drizzle of white chocolate, or colorful sprinkles.
- Use Seasonal Flavors: Incorporate spices like nutmeg or ginger, or flavors like eggnog or cranberry for that holiday flair.
- Create Fun Shapes: Instead of squares, use holiday-shaped cookie cutters for a unique presentation.
These little touches can make a big difference in how your treats are received at parties or gift exchanges.
What are some common mistakes to avoid?
Even seasoned bakers can stumble! Here are a few common pitfalls to dodge when making your Christmas bars:
- Overmixing the Batter: This can lead to dense bars instead of soft and chewy ones. Mix until just combined.
- Neglecting Pan Preparation: Always grease your pan or use parchment paper. Sticking can ruin the presentation.
- Cutting Too Early: Allow your bars to cool completely before cutting; this helps them hold their shape better.
Avoiding these mistakes will ensure your Christmas bars turn out perfectly every time!
Can I freeze Christmas bars?
Absolutely! Freezing is a great way to save your delicious Christmas bars for later enjoyment. Here’s how to do it:
- Cool Completely: Make sure your bars are at room temperature.
- Wrap Well: Use plastic wrap or aluminum foil to keep them airtight. For extra protection, place them in a freezer-safe container.
- Label and Date: This keeps your freezer organized and ensures you enjoy everything while it’s still fresh!
Thaw them in the fridge overnight when you’re ready to enjoy again. For detailed guidelines on freezing baked goods, check out this article for best practices.
With these tips in hand, your holiday baking will shine. Happy baking and enjoy your festive moments!
Conclusion on Christmas Bars
Celebrating with Sweet Treats This Holiday Season
As the holiday season approaches, there’s something undeniably magical about sharing Christmas bars with friends and family. These delightful treats not only capture the essence of the season with their rich flavors and festive aesthetics but also bring loved ones together, creating cherished memories.
Imagine biting into a chewy, spiced Christmas bar while sipping hot cocoa on a cold winter night. It’s just one of those things that make the holidays feel complete. Whether you choose to bake them as gifts or keep them as a sweet indulgence for yourself, these bars are sure to put a joyful spin on your festivities.
Explore variations and discover new combinations for your Christmas bars by checking out sources like Food Network and AllRecipes for inspiration. Enjoying these treats is not just about satisfying your sweet tooth; it’s about celebrating the warmth and joy that comes with this special time of year.
PrintChristmas bars: Indulge in the Best Festive Treats for Everyone

Enjoy a variety of delicious Christmas bars that bring joy to your festive celebrations. Perfect for sharing with family and friends!
- Prep Time: 15 minutes
- Cook Time: 30 minutes
- Total Time: 45 minutes
- Yield: 12 bars
- Category: Dessert
- Method: Baking
- Cuisine: American
- Diet: Vegetarian
Ingredients
- 1 cup flour
- 1/2 cup sugar
- 1/4 cup butter
- 2 eggs
- 1 tsp vanilla extract
- 1/2 cup chocolate chips
Instructions
- Preheat the oven to 350°F (175°C).
- In a bowl, mix flour and sugar.
- Add melted butter, eggs, and vanilla; stir until combined.
- Fold in chocolate chips.
- Pour the batter into a greased baking dish.
- Bake for 25-30 minutes.
- Cool before cutting into bars.
Notes
- For a festive touch, add sprinkles on top before baking.
Nutrition
- Serving Size: 1 bar
- Calories: 150
- Sugar: 10g
- Sodium: 50mg
- Fat: 7g
- Saturated Fat: 4g
- Unsaturated Fat: 2g
- Trans Fat: 0g
- Carbohydrates: 20g
- Fiber: 1g
- Protein: 2g
- Cholesterol: 30mg