Introduction to Classic Cannoli Squares
If you’ve ever indulged in a traditional cannoli, you know how delectable these Italian pastries can be. But what if I told you that you could enjoy all that creamy filling and crispy shell goodness in a convenient square format? Enter the delightful world of classic cannoli squares. This recipe offers a unique twist on the beloved treat, seamlessly blending flavor and texture in a way that’s perfect for sharing—or keeping all to yourself!
A delightful twist on a traditional favorite
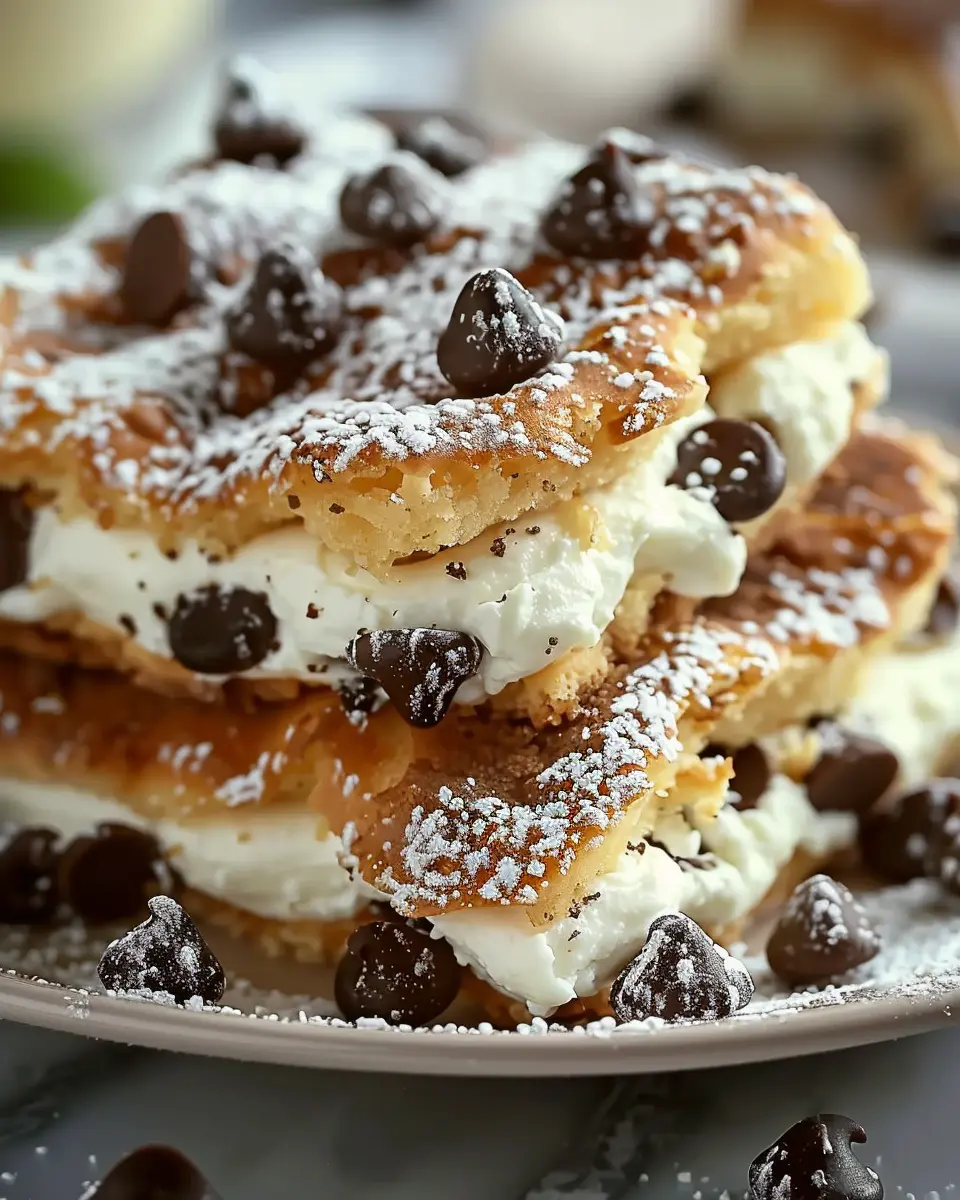
Imagine biting into a fluffy, sweet layer of ricotta and mascarpone cheese, all nestled between delicious layers of chocolate chips and a buttery crust. That’s the magic of classic cannoli squares. Not only do they taste heavenly, but they are simple enough to whip up for a last-minute gathering or a cozy night in.
One of the best things about classic cannoli squares is their versatility. You can dress them up for special occasions or keep them minimalistic for everyday enjoyment. Feel free to experiment with additional toppings like pistachios, orange zest, or even a sprinkle of cinnamon. The beauty of these squares lies in how you can make them your own!
Many Italian desserts often seem complex, but with the right directions and a bit of practice, you’ll find that cannoli squares are surprisingly straightforward. For tips on how to make the perfect ricotta filling, you could check out sources like Serious Eats, which offers great insights into achieving optimal creaminess.
Plus, don’t let the aesthetics fool you; not only are these squares visually appealing, but they are also much more forgiving than traditional cannoli shells, which can be finicky to fry. Whether you’re preparing to dazzle guests or just satisfy a sweet tooth, classic cannoli squares will hit the spot.
So, grab your apron, gather your ingredients, and let’s embark on this delicious journey into the heart of Italian dessert culture, one square at a time!
Ingredients for Classic Cannoli Squares
Creating classic cannoli squares at home is a delightful way to indulge in a traditional Italian dessert without the hassle of frying individual cannoli shells. Here’s what you’ll need to bring this sweet treat to life:
-
For the crust:
-
2 cups all-purpose flour
-
½ cup powdered sugar
-
½ cup unsalted butter, chilled and diced
-
1 large egg yolk
-
2-3 tablespoons cold water
-
For the filling:
-
15 ounces ricotta cheese, drained
-
1 cup powdered sugar
-
1 teaspoon vanilla extract
-
½ cup mini chocolate chips
-
¼ teaspoon cinnamon
-
For the topping:
-
Additional powdered sugar for dusting
-
Chopped pistachios or additional chocolate chips for garnish
These ingredients work harmoniously to create a creamy filling nestled in a sweet, crumbly crust. If you’re looking for alternatives for dietary preferences or allergies, check out this comprehensive guide on ingredient substitutions from The Kitchn. You can also explore interesting takes on cannoli at Serious Eats for further inspiration!
With these ingredients on hand, you’re one step closer to enjoying the rich, creamy flavors of homemade classic cannoli squares. Happy baking!
Preparing Classic Cannoli Squares
Making classic cannoli squares is a delightful process that captures the essence of Italian pastry making without the fuss of traditional cannoli. With their rich, creamy filling and perfectly baked pastry layers, these squares are sure to impress friends and family alike. Let’s dive into each step together!
Gather Your Ingredients
Start by collecting all the ingredients you’ll need. This step sets you up for success and makes the rest of the process smoother.
- Pastry Squares:
- Store-bought phyllo dough or puff pastry for a quick and easy base.
- For the Creamy Filling:
- 2 cups of ricotta cheese (drain excess moisture for the best texture)
- 1 cup of mascarpone cheese (for creaminess)
- ½ cup of powdered sugar (adjust to taste)
- 1 teaspoon of vanilla extract (a splash to enhance flavor)
- Mini chocolate chips or chopped pistachios for a bit of crunch and flair
If you’re looking for more detailed recipes or nutritional insights, check out resources like American Traditional Cuisine. It’s a great spot to discover authentic approaches.
Create the Creamy Filling
Next up is the filling, which is the star of your classic cannoli squares.
-
Drain the Ricotta: Place the ricotta in a fine mesh strainer and let it drain for about 30 minutes. This extra step is crucial; too much moisture will make your filling runny.
-
Mix It Up: In a large mixing bowl, combine the drained ricotta, mascarpone cheese, powdered sugar, and vanilla. Using a hand mixer or a whisk, blend until it’s smooth and creamy.
-
Add Some Fun: Gently fold in your chocolate chips or pistachios for that extra texture and taste that makes cannoli so iconic.
This filling can be made ahead of time and stored for up to two days in the fridge. You might find yourself snacking on it by the spoonful—no judgment here!
Preheat and Prepare Your Baking Dish
Before you get too deep into the assembly, you’ll want to prep your baking dish and preheat the oven. This ensures everything bakes evenly.
-
Preheat the Oven: Set your oven to 350°F (175°C). A preheated oven is key to getting that lovely, golden top.
-
Prepare the Baking Dish: Grease an 8×8 inch baking dish with cooking spray or butter. This step is essential for easy removal once your classic cannoli squares are baked.
Assemble the Layers
Now for the fun part—putting it all together!
-
Lay the Pastry: If you’re using phyllo dough, layer about five sheets in the baking dish, brushing melted butter between each layer. This will create a rich base.
-
Add the Filling: Spread the creamy filling evenly over the pastry. Don’t skimp on this layer; it’s what makes the cannoli experience special.
-
Top It Off: Cover the filling with another few layers of phyllo dough, brushing butter in between. This top layer will crisp up beautifully when baked.
Bake to Golden Perfection
Finally, it’s time to bake those classic cannoli squares.
-
Bake: Place your dish in the preheated oven and bake for about 30-35 minutes, or until the top is golden brown and crisp.
-
Cool Down: Once done, let it cool for at least 15 minutes before slicing. This will help the layers set and keep the filling in place when you cut your squares.
After cooling, dust a little powdered sugar on top to give it that classic dessert look. For an added touch, consider serving with a dollop of whipped cream or a side of fresh fruit.
Now you’re ready to impress everyone with your homemade classic cannoli squares! Whether it’s for a dinner party or just a treat for yourself, these squares are bound to be a hit.
Variations on Classic Cannoli Squares
When it comes to classic cannoli squares, there’s room for creativity beyond the traditional recipe. Let’s take your dessert game to new heights with some exciting variations that are sure to impress your guests.
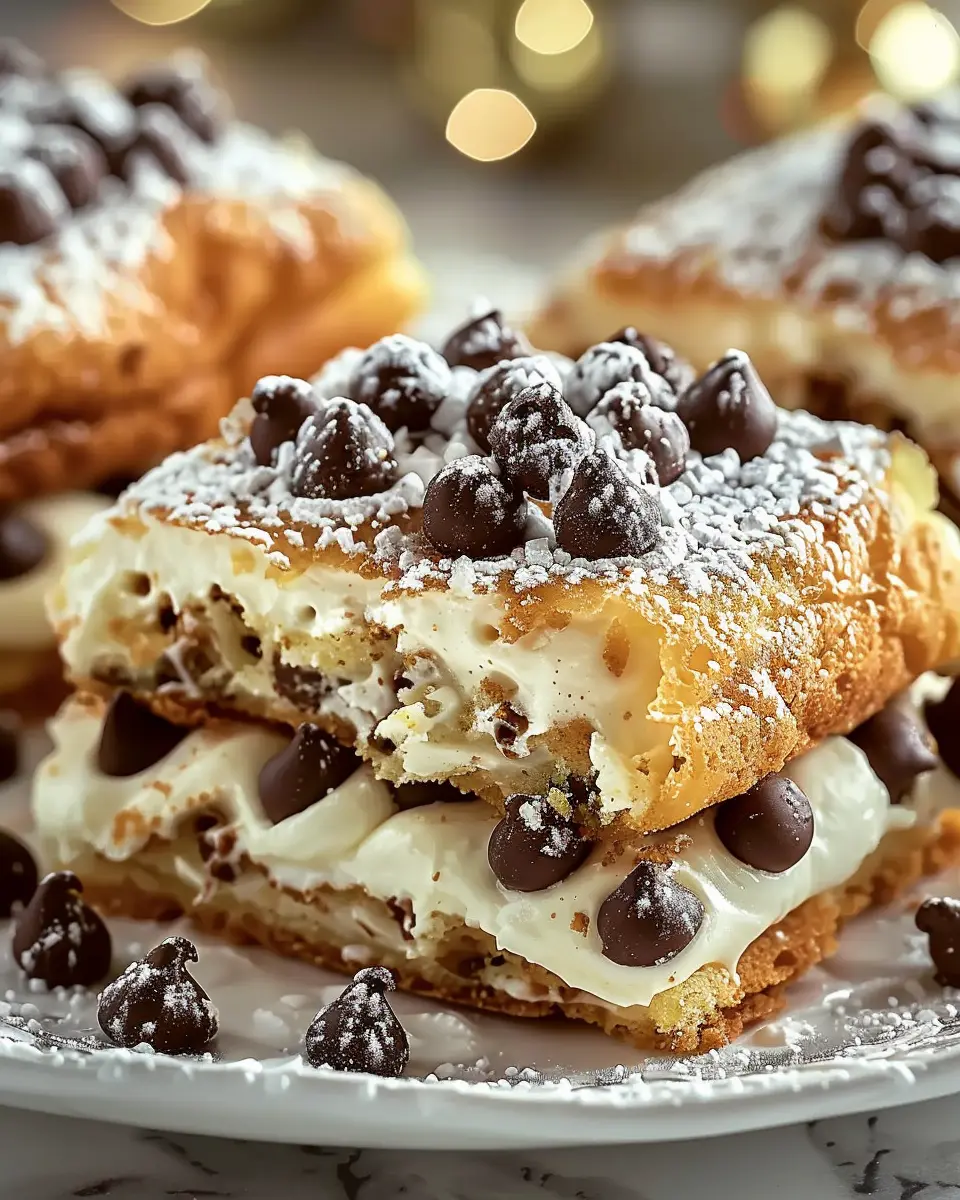
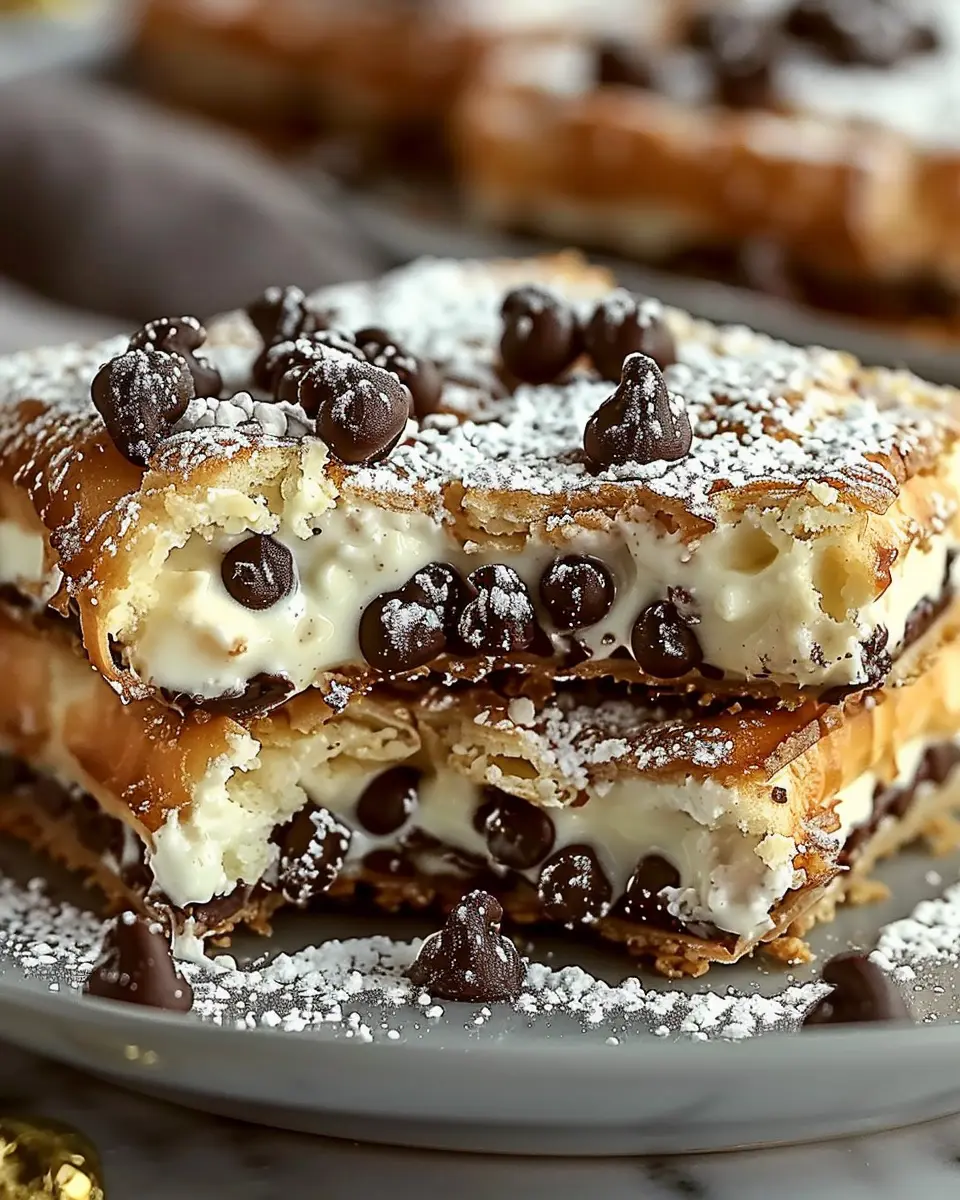
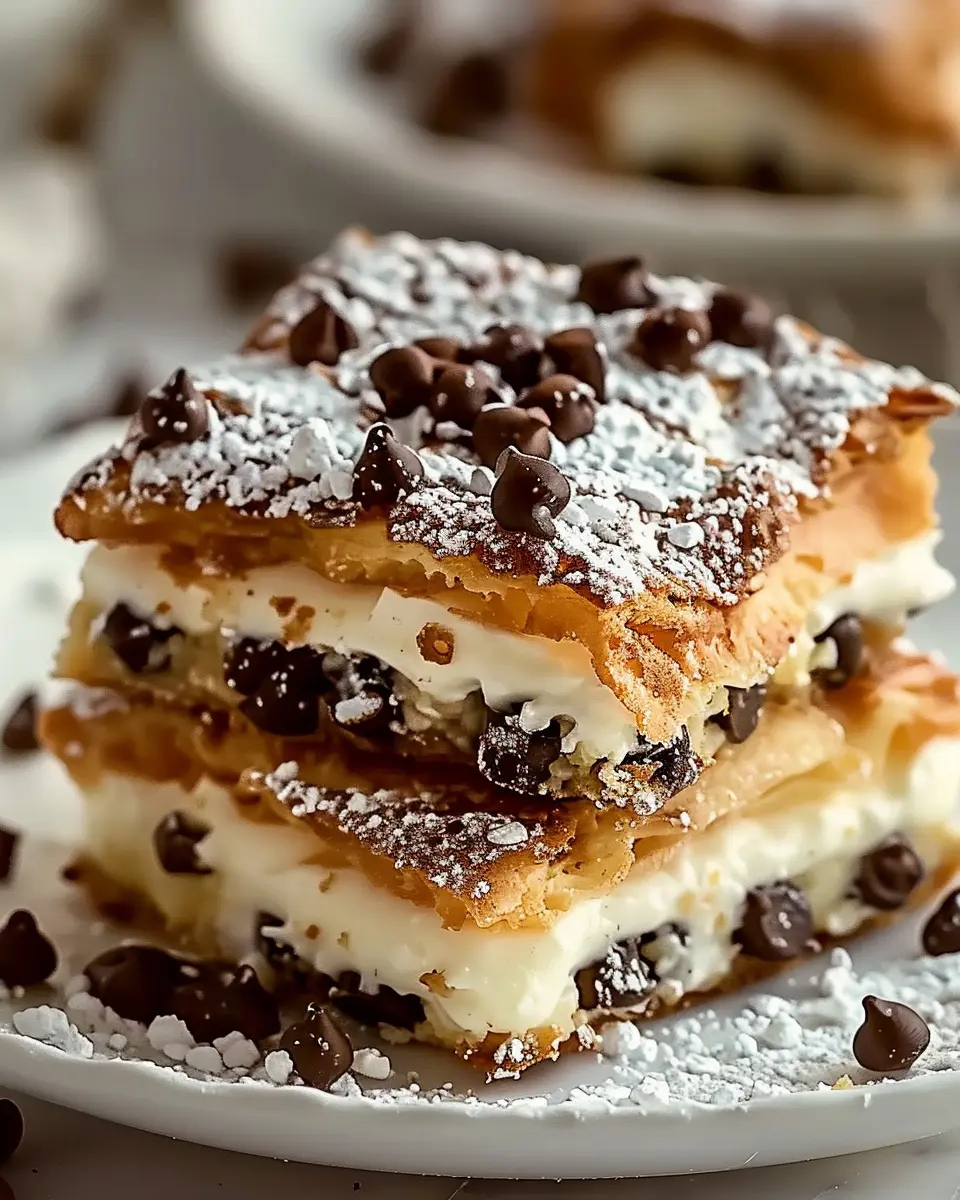
Indulgent Chocolate Chip Cannoli Squares
If you love the rich flavor of chocolate, this variation is your dream come true. Incorporating mini chocolate chips into the creamy ricotta filling adds a sweet crunch that perfectly complements the texture of the squares.
- Ingredients: Aside from your basic cannoli filling, just toss in a cup of mini chocolate chips before spreading the mixture onto the crust.
- Serving Suggestion: Drizzle a little melted chocolate on top before serving for that extra touch of decadence.
These chocolate chip cannoli squares are not just a treat but a conversation starter. Did you know that chocolate has been linked to improved mood, making these squares a delightful pick-me-up?
Fruity Cannoli Squares with a Twist
Looking to add a fresh spin? Consider adding fruits like strawberries or blueberries to your classic cannoli squares. The fruity enhancement not only lends a burst of color but also a refreshing taste.
- Preparation Tip: Fold in about a cup of finely chopped strawberries or blueberries into your filling. It brings a bright flavor that pairs beautifully with the sweetness of the ricotta.
- Serving Suggestion: Garnish with fresh fruit slices on top for an appealing finish.
This fruity version is perfect for summer gatherings or brunch. Besides adding a visual appeal, fruits are loaded with vitamins and antioxidants, giving your dessert a nutritious edge.
Try these variations to ensure that your classic cannoli squares are anything but ordinary. For more inspiration, check out Bon Appétit’s take on innovative desserts!
Cooking Tips and Notes for Classic Cannoli Squares
Creating classic cannoli squares at home is a delightful experience, and with a few handy tips, you can elevate your dessert game.
Perfecting the Shell
- Chill the Dough: Always allow the dough to chill for at least 30 minutes. This helps it become more pliable and easy to roll out.
- Roll Thin: Aim for a thickness of about 1/8 inch when rolling out the dough. A thinner shell will get crispier and complement the creamy filling perfectly.
Crafting the Filling
- Quality Ingredients: Use fresh ricotta cheese for a rich, authentic flavor. Strain it overnight if it’s too watery, ensuring a firmer filling.
- Mix-Ins: Feel free to get creative with your fillings! Adding mini chocolate chips or chopped pistachios can give your squares an extra pop of flavor.
Storage and Serving
- Make Ahead: Assemble your classic cannoli squares a few hours before serving for the best texture. Keep the shells and filling separate until you’re ready to enjoy.
- Presentation: Dust with powdered sugar right before serving to keep them looking fresh and inviting.
If you’re looking for more homemade dessert inspiration, consider checking out this guide on the best Italian desserts to broaden your culinary repertoire!
Serving Suggestions for Classic Cannoli Squares
When it comes to enjoying your classic cannoli squares, the right presentation and accompaniments can elevate the experience significantly. Here are some of my favorite serving suggestions to impress friends and family.
Top with Fresh Berries
Fresh berries, like raspberries or strawberries, add a vibrant touch. Their acidity cuts through the rich, creamy filling, balancing the sweetness perfectly.
Dust with Powdered Sugar
A light dusting of powdered sugar on top right before serving adds a touch of elegance. It not only enhances the overall appearance but also adds an extra hint of sugary delight!
Pair with Coffee or Herbal Tea
Serve your classic cannoli squares with a cup of freshly brewed coffee or a soothing herbal tea. The warm beverage complements the dessert beautifully, creating a delightful contrast of flavors.
Create a Dessert Platter
For a special occasion, create a dessert platter featuring your squares alongside other treats. Include items like mini fruit tarts, chocolate-covered strawberries, or even some rich brownies for a sweet variety.
Don’t Forget the Whipped Cream
Finally, a dollop of freshly whipped cream can take your squares to another level. It adds a creamy texture that pairs wonderfully with the cannoli filling.
With these serving suggestions, your classic cannoli squares will surely be the star of any dessert table! For more tips on hosting delightful gatherings, check out resources from Marie Claire (source) and the Food Network (source).
Time Breakdown for Classic Cannoli Squares
Preparation Time
Getting ready to create your classic cannoli squares? It’ll take you about 20 minutes to gather your ingredients and prep the crust and filling. This part is where your creativity really shines, so enjoy it!
Baking Time
Now, the magic happens in the oven! You’ll want to bake your cannoli squares for about 30 minutes. Make sure to watch them closely—nobody likes a burnt treat.
Cooling Time
Once they’re baked to perfection, let your squares cool for at least 1 hour. This cooling period is essential, allowing the flavors to meld beautifully.
Total Time
From prep to cooling, you’re looking at around 1 hour and 50 minutes for a delicious batch of classic cannoli squares. Not too bad for a dessert that will impress your friends and family!
Nutritional Facts for Classic Cannoli Squares
Calories
When indulging in classic cannoli squares, it’s good to keep track of those calories without losing the joy of this delightful dessert. Each square contains approximately 200 calories, making it a manageable treat for your sweet cravings. Remember, moderation is key!
Key Nutrients Breakdown
Let’s dive into what makes these classic cannoli squares a tasty yet guilt-friendly option:
- Carbohydrates: About 30 grams, providing a quick energy boost.
- Proteins: Roughly 4 grams, offering some muscle-building benefits.
- Fats: Around 8 grams, crucial for flavor while keeping your diet balanced.
- Sugars: Approximately 10 grams, just enough sweetness to satisfy without overloading on sugar.
Curious to learn more about how dessert fits into a balanced diet? Check out resources from the Mayo Clinic for expert nutritional insights.
So, as you whip up your batch of classic cannoli squares, enjoy the flavors while staying mindful of the nutritional profile. Balancing fun and nutrition can transform any dessert into a delightful experience!
FAQs about Classic Cannoli Squares
Can I make classic cannoli squares gluten-free?
Absolutely! Making classic cannoli squares gluten-free is easier than you might think. Simply substitute regular flour with a high-quality gluten-free blend. Look for blends that contain a mix of brown rice flour, tapioca starch, and potato starch for the best results. Many brands also offer all-in-one gluten-free flours, which can simplify the process. Just ensure that any additional ingredients you use, like chocolate chips or nuts, are also gluten-free.
How long do cannoli squares last?
When stored properly, cannoli squares can last for about 3 to 5 days in the refrigerator. Make sure to place them in an airtight container to maintain freshness. They may be safely frozen for longer, up to 2 months, but keep in mind that the texture might change slightly after thawing. To enjoy them at their best, consider consuming them fresh!
What should I do if I can’t find ricotta cheese?
If ricotta cheese is hard to find, don’t worry — alternatives are waiting for you! Cream cheese mixed with a bit of sour cream can yield a similar texture and flavor for your classic cannoli squares. Additionally, you could try cottage cheese, but be sure to blend it until smooth to avoid a grainy texture. For a dairy-free option, look for tofu-based ricotta, which is readily available at grocery stores and can be seasoned to taste.
For more tips on substitutions, check out resources like The Kitchn or Serious Eats. Happy baking!
Conclusion on Classic Cannoli Squares
In summary, classic cannoli squares are an irresistible twist on the beloved Italian pastry that everyone can enjoy. They offer the perfect blend of rich flavors and delightful textures, making them an ideal dessert for gatherings or cozy nights in. Plus, they are quite simple to prepare, even for novice bakers.
By following this recipe, you’ll not only impress your friends but also treat yourself to a sweet indulgence that’s sure to leave a lasting impression. Want to elevate your dessert game? Explore more about Italian desserts through resources like Serious Eats or PBS Food. Happy baking!
PrintClassic Cannoli Squares: The Best Indulgent Treat for Everyone

A rich and creamy dessert that captures the essence of traditional cannoli in a convenient square form.
- Prep Time: 30 minutes
- Cook Time: 25 minutes
- Total Time: 55 minutes
- Yield: 12 servings
- Category: Dessert
- Method: Baking
- Cuisine: Italian
- Diet: Vegetarian
Ingredients
- 1 cup ricotta cheese
- 1 cup mascarpone cheese
- 1 cup powdered sugar
- 1 teaspoon vanilla extract
- 1/2 cup mini chocolate chips
- 1/2 cup crushed pistachios
- 1 package store-bought puff pastry
- 1 egg (for egg wash)
Instructions
- Preheat the oven to 400°F (200°C).
- Roll out the puff pastry and cut into squares.
- In a bowl, mix the ricotta, mascarpone, powdered sugar, and vanilla until smooth.
- Fold in the chocolate chips and crushed pistachios.
- Spoon the mixture onto the pastry squares and fold them over.
- Brush with egg wash and bake until golden.
- Let cool before serving.
Notes
- Serve chilled for best flavor.
- You can substitute the chocolate chips with dried fruits if preferred.
Nutrition
- Serving Size: 1 square
- Calories: 250
- Sugar: 15g
- Sodium: 50mg
- Fat: 16g
- Saturated Fat: 10g
- Unsaturated Fat: 4g
- Trans Fat: 0g
- Carbohydrates: 25g
- Fiber: 1g
- Protein: 4g
- Cholesterol: 50mg