Introduction to Pizookie Baking Tips
When it comes to indulgent desserts, few can compete with the glorious pizookie. This delightful fusion of a pizza and cookie—often served warm and topped with a scoop of ice cream—has become a beloved staple among dessert lovers. But what truly makes the pizookie the ultimate dessert experience?
One of the key factors is its versatility. You can customize your pizookie to match your taste preferences by experimenting with different flavors and toppings. Want a classic chocolate chip pizookie? No problem! Prefer something more adventurous, like a cookie butter pizookie? Go for it! The possibilities are endless, allowing you to create a personalized dessert for any occasion.
Moreover, according to a 2021 survey by the American Institute of Baking, 45% of consumers reported that they prefer their desserts a bit warm, which is precisely what a pizookie offers. Picture this: a freshly baked cookie, gooey in the center, paired with cold, creamy ice cream. It’s simply irresistible! To explore more about the science of baking and how warmth affects flavors, check out sources like Serious Eats or America’s Test Kitchen.
Now, onto the importance of pizookie baking tips! Proper technique can make or break your dessert. Pay close attention to the following essential tips to elevate your pizookie game:
- Use Quality Ingredients: High-quality chocolate and butter can significantly enhance flavor.
- Preheat Your Oven: A well-heated oven ensures your pizookie cooks evenly.
- Experiment with Cooking Time: Keep a close eye on your pizookie. You want a perfectly gooey center, which usually requires a shorter baking time than traditional cookies.
- Think About Toppings: Adding diverse toppings can transform your pizookie from great to extraordinary. Consider drizzling caramel sauce or adding crushed nuts for an extra layer of flavor.
By keeping these pizookie baking tips in mind, you’ll create an enviable dessert that friends and family will rave about. Ready to dive into baking your own? Let’s get those ovens warmed up!
Ingredients for Pizookie
Key ingredients for the perfect pizookie
Creating a mouthwatering pizookie—that delightful cross between a cookie and a pizza—starts with essential ingredients that will make your dessert irresistible. Here’s what you’ll need:
- Flour: All-purpose flour is ideal for the perfect texture.
- Sugar: Granulated sugar adds sweetness, while brown sugar contributes to that chewy goodness.
- Butter: Use unsalted butter for improved control over flavor.
- Eggs: Just one large egg binds everything together, creating a rich, decadent base.
- Baking soda: This ingredient aids in the rising process, ensuring your pizookie isn’t dense.
- Chocolate chips: Opt for semi-sweet or dark chocolate chips to satisfy your sweet tooth.
Finding quality ingredients can elevate your pizookie baking tips experience. For instance, using high-quality chocolate can make a world of difference!
Optional add-ins to elevate your pizookie
Ready to take your pizookie to the next level? Consider adding any of these fun ingredients:
- Nuts: Chopped walnuts or pecans for a satisfying crunch.
- Dried fruits: Think cranberries or raisins for a tart twist.
- Candy: Crushed candy bars or sprinkles for a playful touch.
These additions not only enhance flavor but also give your pizookie a personal touch. Why stick to the basics when you can get creative?
Preparing Your Pizookie
Who doesn’t love digging into a warm, gooey pizookie? This delightful cross between a cookie and a brownie is perfect for indulging your sweet tooth. If you’re ready to take on this delicious challenge, I’m here to guide you through each step of the process with some handy pizookie baking tips along the way. Let’s get started!
Gather Your Ingredients
Before you dive into your pizookie adventure, take a moment to gather your ingredients. Trust me, having everything ready before mixing makes the whole process smoother and more enjoyable. Here’s what you’ll need:
- 1/2 cup unsalted butter, softened
- 1 cup brown sugar, packed
- 1/2 cup granulated sugar
- 1 large egg
- 1 teaspoon vanilla extract
- 2 cups all-purpose flour
- 1 teaspoon baking soda
- 1/2 teaspoon salt
- 1 cup chocolate chips (or your favorite mix-ins!)
Make sure to check your pantry for these essentials. Need some high-quality chocolate chips? Consider brands like Guittard or Ghirardelli which can be found online for a delightful upgrade to your pizookie.
Cream the Butter and Sugar
Now that your ingredients are ready to go, it’s time to start mixing. In a large bowl, cream together the softened unsalted butter, brown sugar, and granulated sugar. Use an electric mixer if you have one, or a sturdy spatula will do just fine with a bit of elbow grease. You’re aiming for a light and fluffy consistency here, which typically takes about 2-3 minutes.
Why is this step important? According to food science, creaming incorporates air into the mixture, helping create that perfectly chewy texture in your pizookie.
Mix in the Dry Ingredients
Next up is the fun part—combining your dry ingredients! Sprinkle the flour, baking soda, and salt into your creamed mixture. At this point, it’s crucial to mix gently; overmixing is the enemy of cookie dough, leading to toughness instead of that desirable softness.
Tip: To avoid lumps in your pizookie base, consider sifting your dry ingredients together first. It’s an extra step, but it helps with that uniform texture.
Fold in the Chocolate Chips
Once your dough is mixed, it’s time to add the star of the show—the chocolate chips! Gently fold them into your dough using a spatula, ensuring an even distribution. This is where you can get creative! Want to substitute half of your chocolate chips with nuts or dried fruit? Go for it! The beauty of a pizookie is that it’s versatile and completely customizable.
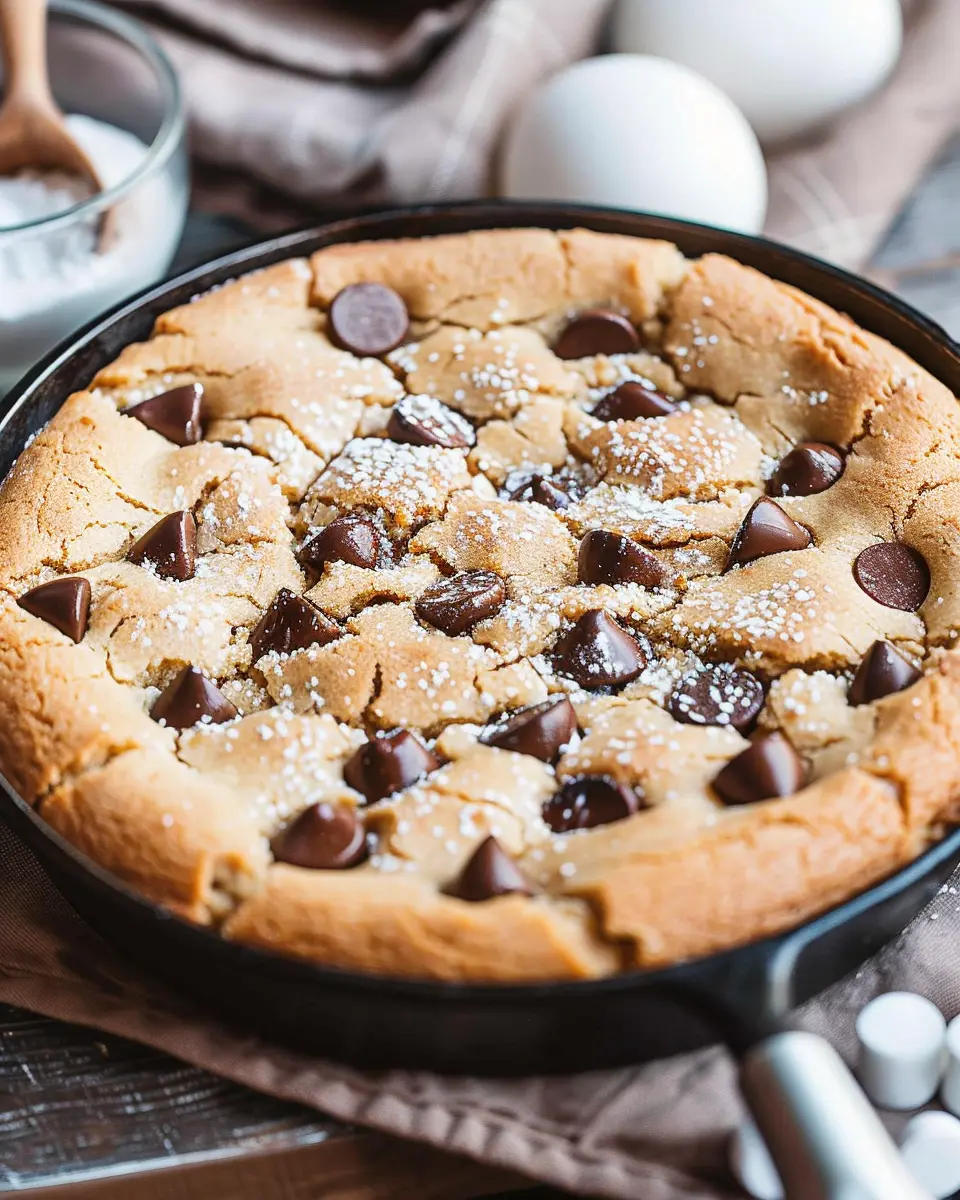
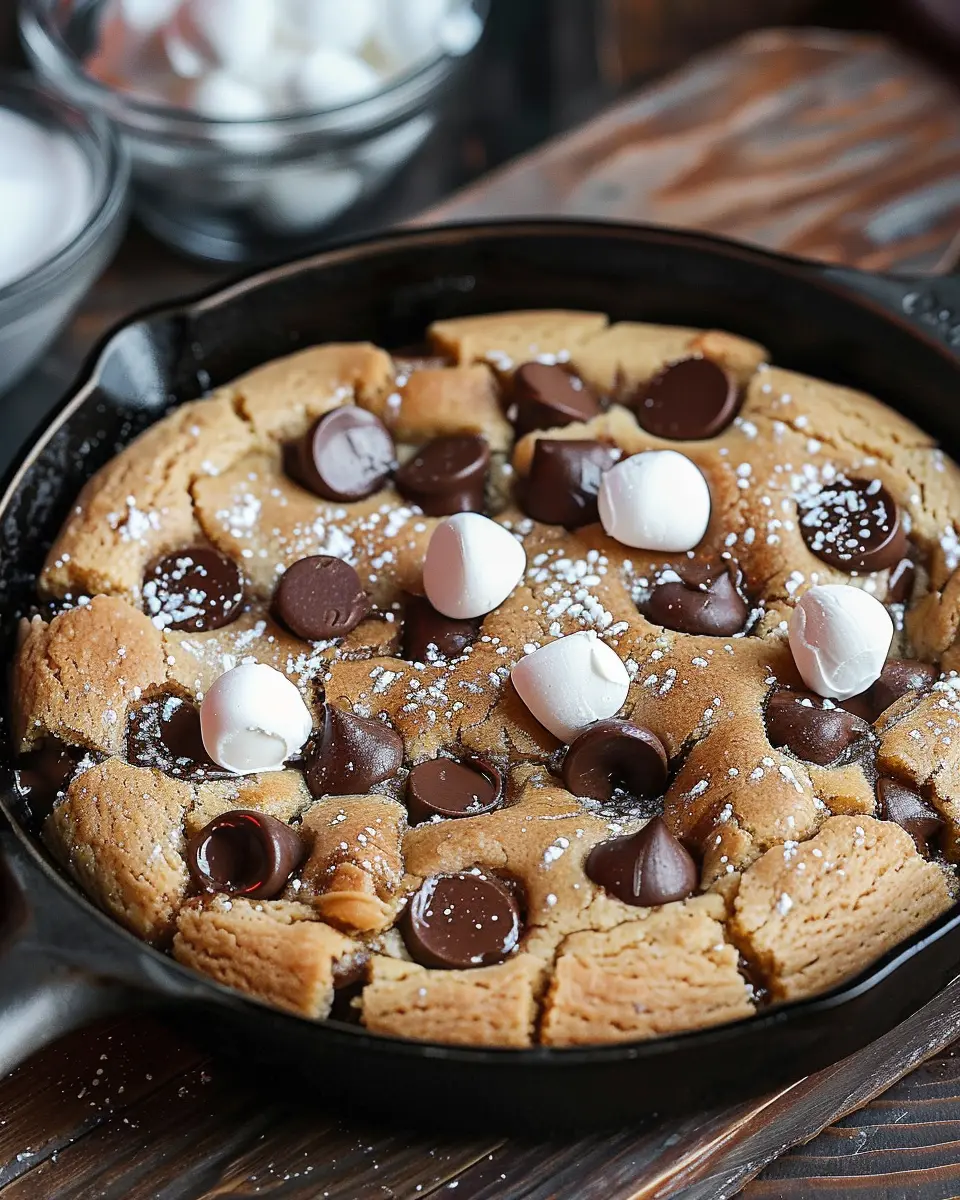
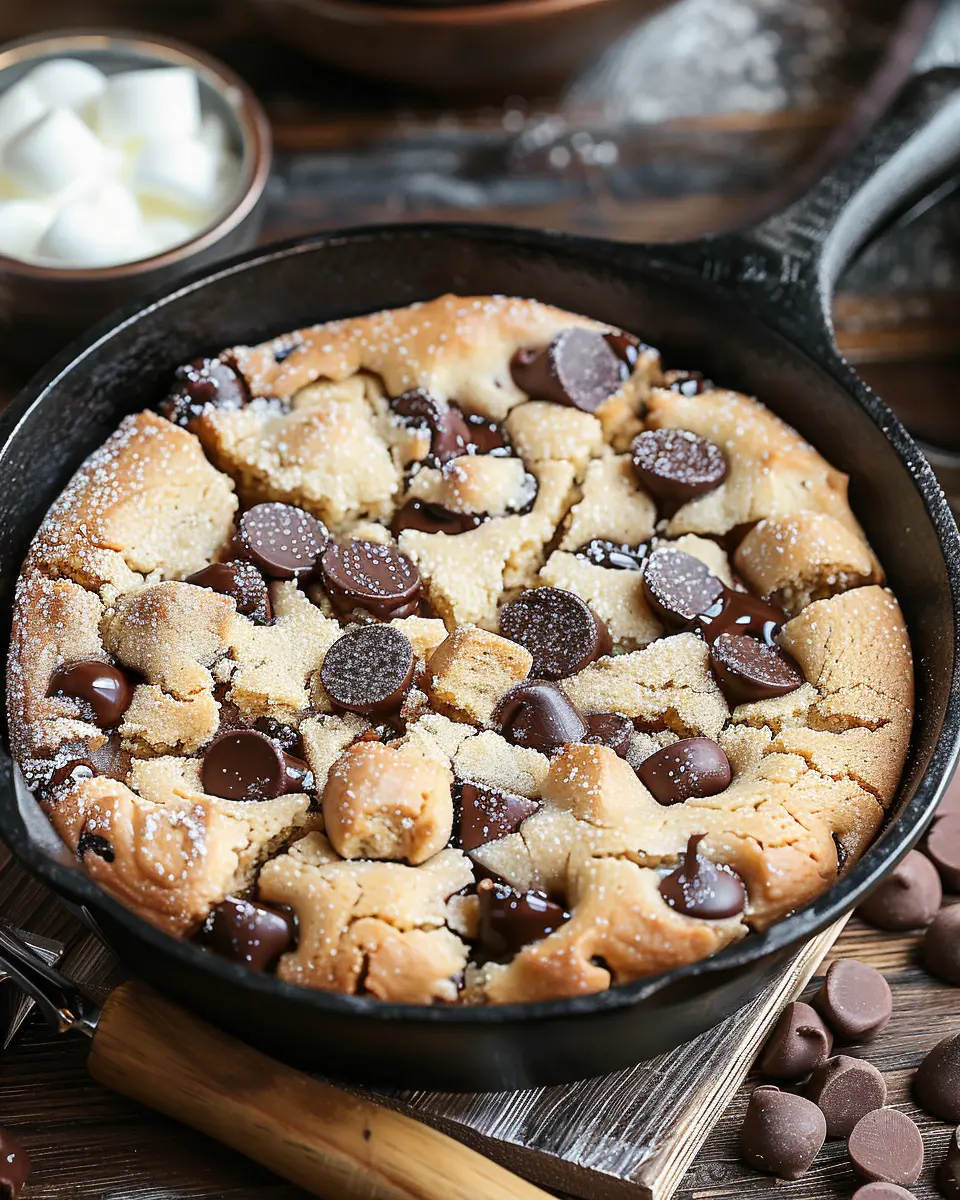
Spread and Bake the Mixture
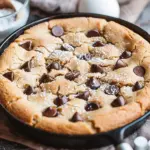
With the dough prepared, now it’s time to spread it out. Take a 9-inch cast iron skillet or an oven-safe baking dish, and lightly grease it to prevent sticking. Spoon the dough into the dish, spreading it evenly.
Preheat your oven to 350°F (175°C) and pop the skillet into the oven for 20-25 minutes. Keep an eye on it as the edges start to turn golden brown. The center should be soft but not jiggly; remember, it will continue to cook a bit while cooling.
Let It Cool and Slice
Once baked, let your pizookie sit for about 10 minutes. This waiting period is crucial—you want it to firm up just enough so it doesn’t fall apart when you slice it! Once it’s had a chance to cool slightly, grab a pizza cutter or a large knife and slice it into wedges or squares.
And there you have it! Your homemade pizookie is ready to be devoured, perhaps with a scoop of vanilla ice cream on top for that ultimate dessert experience. For more great ideas on toppings and variations, check out resources like Serious Eats, which offers fantastic insights into dessert creativity.
Now that you’ve conquered the art of making a pizookie, gather some friends, grab a spoon, and enjoy your delicious creation! Happy baking!
Variations on Pizookie
When it comes to delightful desserts, few things hit the spot like a freshly baked pizookie. While the classic version reigns supreme, you can easily get creative in the kitchen with some fun variations that cater to every palate.
Classic Chocolate Chip Pizookie
Let’s start with the beloved classic: the chocolate chip pizookie. It’s simplicity at its finest. To make this nostalgic treat:
- Combine 1 cup of brown sugar, ½ cup of granulated sugar, and 1 cup of softened butter.
- Mix in 2 cups of all-purpose flour, and a pinch of salt, and fold in 1 cup of chocolate chips.
- Bake at 350°F for about 25 minutes, and voilà!
You can serve it warm with a scoop of vanilla ice cream on top. There’s nothing quite like the gooey chocolate melting into the warm cookie. A true indulgence!
Peanut Butter Pizookie
If you’re a peanut butter lover, this version will have you swooning. The peanut butter pizookie is rich and satisfying:
- Use ½ cup of creamy peanut butter instead of some butter in the classic recipe.
- Add chopped peanuts and chocolate chips for that extra crunch.
- Bake it just like the classic, and serve it with a drizzle of chocolate sauce.
Imagine sinking your spoon into this warm, nutty goodness while enjoying a cozy evening.
Berry or Fruit Pizookie Variations
For a fresher take, consider mixing in your favorite berries or fruits! A berry pizookie can brighten up your dessert game:
- Substitute chocolate chips with a mixture of blueberries, strawberries, or raspberries.
- You might even want to add a splash of lemon juice for a zesty kick.
Take a bite, and you’ll savor the wonderful blend of sweet cookie dough and fruity flavors. For pizookie baking tips, remember that ripe fruits work best!
No matter which variation you choose, pizookies are incredibly versatile. Feel free to experiment with flavors or combinations. Want some more inspiration? Check out these pizookie recipes that can guide you in your sweet adventures!
Baking Notes for Pizookie
Tips for Achieving the Perfect Texture
Creating a delicious pizookie is all about the right texture—soft and gooey in the center with a slightly crisp edge. To nail this, consider these pizookie baking tips:
- Preheat your oven: A hot oven helps achieve that ideal contrast between textures. Make sure it’s set to the right temperature before you pop in your dough.
- Watch the bake time: Keep an eye on your cookie as it bakes. The edges should look golden while the middle remains slightly undercooked; it will continue to cook as it cools.
- Use the right pan: A cast-iron skillet is perfect for an even bake and that beloved crispiness. But if you don’t have one, any oven-safe dish will do.
Troubleshooting Common Baking Problems
Even seasoned bakers encounter hiccups. Here’s how to troubleshoot common issues:
- Pizookie too dry? This might happen if it bakes too long or at too high a temperature. Aim for that gooey middle!
- Burnt edges? Consider using a lower shelf in the oven. This helps prevent over-baking while allowing the center to cook through.
For further guidance, check out this comprehensive guide on cookie baking techniques for even more insights! Happy baking!

Serving Suggestions for Pizookie
Craving something indulgent? Here’s how to take your pizookie experience to the next level!
Pairing with Ice Cream and Sauces
One of the best things about a pizookie is its versatility. Top your freshly baked cookie with a generous scoop of vanilla or chocolate ice cream, allowing the heat to slightly melt the edges. Drizzle with warm chocolate syrup or caramel sauce for a decadent finish. For a fruity twist, consider a scoop of strawberry or raspberry sorbet, which adds a refreshing contrast to the rich cookie. According to the National Ice Cream Retailers Association, the average American consumes about 20.8 pounds of ice cream annually — a perfectly good excuse to indulge!
Creative Ways to Serve Pizookie
Think beyond the ordinary! Serve individual pizookies in mini skillets for a fun and rustic presentation. If you’re feeling adventurous, experiment with flavored batters, such as peanut butter or pumpkin spice, to cater to seasonal cravings. You could even create a pizookie bar at your next gathering, complete with various toppings like nuts, sprinkles, and fresh fruits, allowing friends to customize their concoction. These engaging serving ideas can elevate your baking experience and keep your guests coming back for more!
For additional pizookie baking tips, be sure to check out our favorite recipes and topping inspirations. Happy baking!
Time Breakdown for Pizookie
Preparation Time
Getting started on your pizookie baking tips journey is a breeze! You’ll need about 10-15 minutes to gather your ingredients and assemble your dough. Don’t forget to let your butter soften ahead of time, as it makes mix-ins much easier!
Baking Time
Once you slide that delightful mixture into the oven, set a timer for 20-25 minutes. The goal is a golden-brown top that hints just enough at gooeyness beneath. For the best results, keep a close eye in those final few minutes!
Total Time
In just about 35-40 minutes, you’ll have a warm, cookie-like dessert ready for devouring. Pair it with some vanilla ice cream for an indulgent experience that friends and family will rave about!
If you’re seeking detailed insights on specific pizookie variations, consider checking out these articles on Joy of Baking or Serious Eats. Enjoy your baking adventure and indulge guilt-free!
Nutritional Facts for Pizookie
Calories per serving
If you’re looking to indulge with a pizookie, knowing the calories can help you balance your cravings. On average, a single serving of this delicious dessert contains around 300-400 calories, depending on the specific ingredients and toppings you choose. A slice of pizza’s worth of happiness, right?
Key nutritional components
When it comes to the nutritional breakdown, here are some key components to consider:
- Sugars: A standard pizookie can have up to 20 grams of sugar, so it’s definitely a treat to savor.
- Fats: Expect approximately 15 grams of fat per serving, with the option to customize this based on your choice of toppings.
- Carbohydrates: Most pizookies contain around 50 grams of carbs, making them a sugary delight for those with a sweet tooth.
For more insights on balancing sweet treats with a healthy lifestyle, check out Healthline’s guidelines. With these pizookie baking tips, you can enjoy this dessert while still being mindful of your health!
FAQs about Pizookie
Can I use gluten-free flour for pizookie?
Absolutely! You can use gluten-free flour for your pizookie, and it works wonderfully. Look for a gluten-free all-purpose blend that includes xanthan gum, as it helps achieve the chewy texture that pizookies are known for. Brands like Bob’s Red Mill or King Arthur offer great options. Just be aware that the flavor and texture may vary slightly, but your dessert will still be delicious!
How can I store leftover pizookie?
Storing leftover pizookie is quite simple. Allow it to cool down completely, then cover it tightly with plastic wrap or transfer it to an airtight container. You can keep it at room temperature for a day or two, but for longer storage, it’s best to refrigerate it. If you tend to make a big batch (and who doesn’t?), slice the pizookie and store the individual pieces, making it easy to enjoy a sweet treat whenever you like!
What’s the best way to reheat pizookie?
When you’re ready to indulge in your leftover pizookie, reheating it properly is key to reviving its gooey goodness. Preheat your oven to 350°F (175°C), and place the pizookie on a baking sheet. Heat it for about 5 to 10 minutes until warm. If you’re in a hurry, microwaving is an option too — just pop a slice in for about 15-20 seconds. Serve warm with a scoop of vanilla ice cream for the ultimate indulgence!
For more pizookie baking tips and inspiration, check out some popular dessert blogs like Sally’s Baking Addiction or Bigger Bolder Baking. You’ll find additional unique variations that can elevate your pizookie experience!
Conclusion on Pizookie Baking Tips
In summary, creating the perfect pizookie is a delightful adventure. Remember, the base of your cookie dough should be rich and buttery, while the toppings can be as indulgent as you wish. Don’t hesitate to experiment with flavors and textures; mix in nuts or even swap chocolate chips for butterscotch.
We encourage you to share your pizookie creations with friends and family! It’s a fun way to showcase your baking progress. If you have any unique pizookie baking tips or stories, please share them in the comments below. Let’s bake up some magic together!
PrintPizookie Baking Tips: Indulgent Treats for Homemade Happiness
Discover delicious tips for baking the perfect pizookie, an indulgent dessert that combines cookies and pizza.
- Prep Time: 15 minutes
- Cook Time: 25 minutes
- Total Time: 40 minutes
- Yield: 4-6 servings
- Category: Dessert
- Method: Baked
- Cuisine: American
- Diet: Vegetarian
Ingredients
- 1 cup all-purpose flour
- 1/2 cup brown sugar
- 1/4 cup granulated sugar
- 1/2 cup unsalted butter, softened
- 1 large egg
- 1 teaspoon vanilla extract
- 1/2 teaspoon baking soda
- 1/4 teaspoon salt
- 1 cup chocolate chips
Instructions
- Preheat the oven to 350°F (175°C).
- In a bowl, cream together the softened butter, brown sugar, and granulated sugar until smooth.
- Add the egg and vanilla extract, mixing until fully incorporated.
- In a separate bowl, whisk together the flour, baking soda, and salt.
- Gradually add the dry ingredients to the wet ingredients, mixing until just combined.
- Fold in the chocolate chips.
- Spread the dough evenly in a greased oven-safe skillet.
- Bake for 20-25 minutes, until the edges are golden and the center is slightly soft.
- Let it cool slightly before serving.
Notes
- Serve with a scoop of ice cream for extra indulgence.
- Experiment with different mix-ins like nuts or caramel.
Nutrition
- Serving Size: 1 pizookie
- Calories: 350
- Sugar: 22g
- Sodium: 150mg
- Fat: 18g
- Saturated Fat: 10g
- Unsaturated Fat: 6g
- Trans Fat: 0g
- Carbohydrates: 43g
- Fiber: 1g
- Protein: 4g
- Cholesterol: 50mg