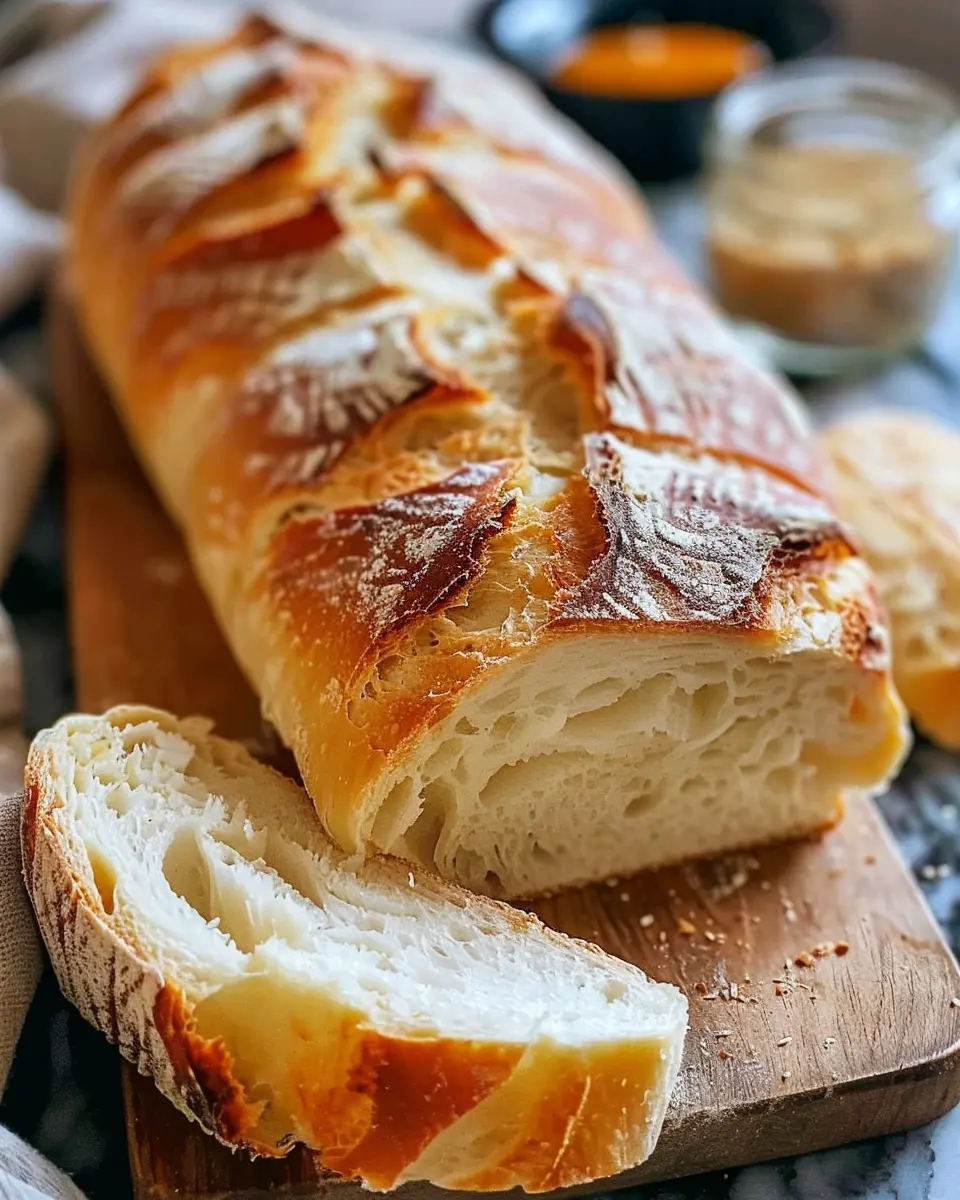
Introduction to Beginner-Friendly Homemade Bread
There’s something truly magical about the aroma of freshly baked bread wafting through your kitchen. If you’ve ever bought a loaf at the store and wished you could replicate that delightful experience at home, you’re in the right place! Making your own bread not only allows you to customize flavors and textures, but it also connects you to a rich culinary tradition that dates back thousands of years.
Why Make Your Own Bread?
So, why should you take the plunge and embark on your journey with a beginner-friendly homemade bread recipe? Here are just a few compelling reasons:
- Healthier Ingredients: When you make your own bread, you’re in complete control of the ingredients. You can choose organic flour, avoid preservatives, and even add nutritious seeds or whole grains to amp up the health factor.
- Cost-Effective: Buying artisanal bread can be quite pricey, especially if you’re opting for specialty loaves. However, making bread at home is economical. A simple homemade loaf can cost only a fraction of store-bought versions!
- Creative Expression: Baking allows you to experiment with flavors. Want to try adding herbs, nuts, or even Turkey Bacon? The possibilities are endless, and it can be incredibly satisfying to see your unique creations rise and come to life in the oven.
- Community Connection: Sharing your homemade bread can be a great way to strengthen bonds with friends and family. Consider gifting a loaf to a neighbor or bringing a warm bread basket to a potluck, and watch as your efforts foster connection.
As a seasoned home baker, I can assure you that the benefits extend far beyond the loaf itself. Each time you knead the dough, you’re engaging with a tactile craft that can be both meditative and rewarding. Plus, once you nail the basics, you have a fantastic skill to impress friends or enhance your meal prep routine.
If you’re feeling uncertain about where to start, don’t fret! With a straightforward recipe and a few handy tips, you’ll soon be enjoying warm slices of your very own homemade bread. Ready to dive in? Let’s get baking!
Ingredients for Beginner-Friendly Homemade Bread
Making your own bread is a rewarding experience that fills your kitchen with amazing aromas and gives you something delicious to enjoy. To get started, let’s gather the essentials for this beginner-friendly homemade bread recipe.
Must-Have Ingredients
- All-Purpose Flour: You’ll need about 4 cups of flour. This is your main ingredient, providing the structure of your bread.
- Active Dry Yeast: For that perfect rise, grab 2 ¼ teaspoons. Yeast brings your bread to life, making it fluffy.
- Salt: Don’t skip the salt—about 1 ½ teaspoons enhances flavor and manages yeast activity.
- Warm Water: 1 ¾ cups of warm (not hot!) water helps awaken the yeast and blends the ingredients.
- Sugar: A teaspoon sugar helps feed the yeast, boosting fermentation and making your bread light.
- Olive Oil or Melted Butter: For a rich flavor and soft texture, use 2 tablespoons.
Feel free to explore supplemental flavors, such as herbs or cheese, to create variations of your own! If you’re curious about different bread-making techniques, you might find King Arthur Baking a great resource. Happy baking!
Step-by-Step Preparation for Beginner-Friendly Homemade Bread
Making homemade bread can seem daunting, especially for beginners, but with this beginner-friendly homemade bread recipe, you’ll find that creating your own delicious loaf is not just achievable, but also immensely rewarding. Follow these steps, and soon you’ll be savoring the aroma of freshly baked bread right in your kitchen.
Activate the yeast
First things first—let’s wake up that yeast! In a small bowl, combine:
- 1 packet (¼ ounce) of active dry yeast
- 1 tablespoon of sugar
- ½ cup of warm water (about 110°F or 43°C)
Let it sit for about 5-10 minutes until it becomes frothy. This is how you know your yeast is alive and ready to work its magic. If it doesn’t froth, it might be time to check the expiration date on that yeast!
More on yeast activation can be found here.
Combine the ingredients
Once your yeast is active, gather the following ingredients in a large mixing bowl:
- 3 cups of all-purpose flour
- 1 teaspoon of salt
- The yeast mixture you just prepared
Mix everything together until it forms a rough dough. Don’t worry if it looks a little shaggy; you’re on the right track. Remember, using quality ingredients can make all the difference. Try taking a look at sources like Serious Eats for additional insights into ingredient choices.
Knead the dough
Now comes the fun part: kneading! Transfer the dough onto a floured surface and knead it for about 8-10 minutes. This means folding, pressing, and stretching the dough until it becomes smooth and elastic. Here’s a tip: if the dough sticks to your hands, sprinkle a bit more flour, but don’t go overboard—too much flour can dry out your bread.
First rise
After kneading, place the dough in a lightly greased bowl and cover it with a damp cloth or plastic wrap. Let it rise in a warm place until it doubles in size—this usually takes about 1-2 hours. You could place it in your oven (turned off) with the light on for some extra warmth!
Shape the dough
Once your dough has risen to perfection, gently punch it down to release the gas bubbles. Transfer it back to your floured surface and shape it into a loaf. You can opt for a circular or rectangular shape, whichever you prefer. Take your time here—it’s all about the aesthetics, too!
Second rise
After shaping, let your dough rise again in the loaf pan you’ll be baking it in. Cover it lightly with a towel and let it rise for another 30-60 minutes, until it has puffed up noticeably. This second rise helps to create that desirable texture.
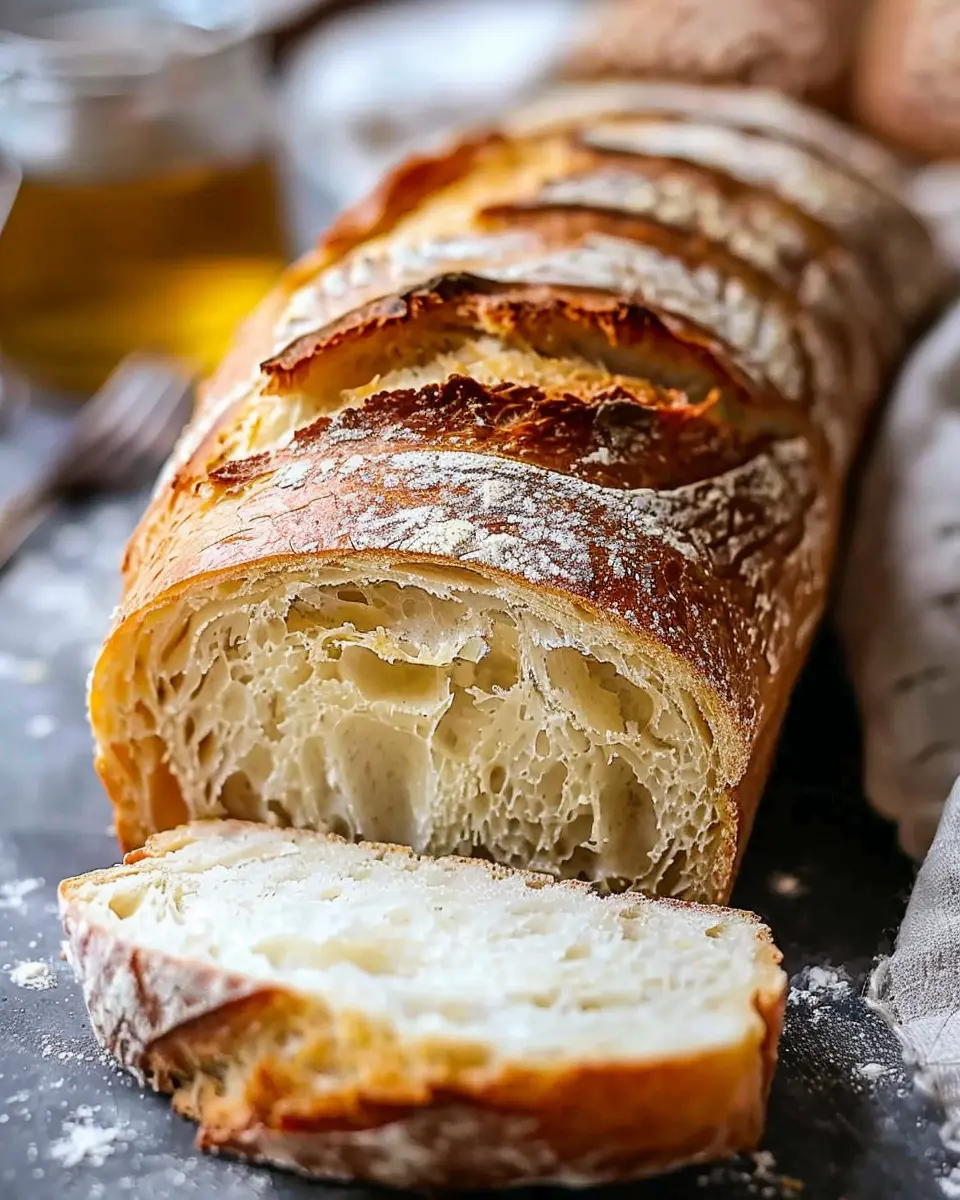
Bake the bread
Finally, preheat your oven to 375°F (190°C). Once your dough has completed its second rise, place it in the oven and bake for 30-35 minutes, or until the top is golden brown and sounds hollow when tapped. A kitchen thermometer can help here; you’re aiming for an internal temperature of around 190°F (88°C).
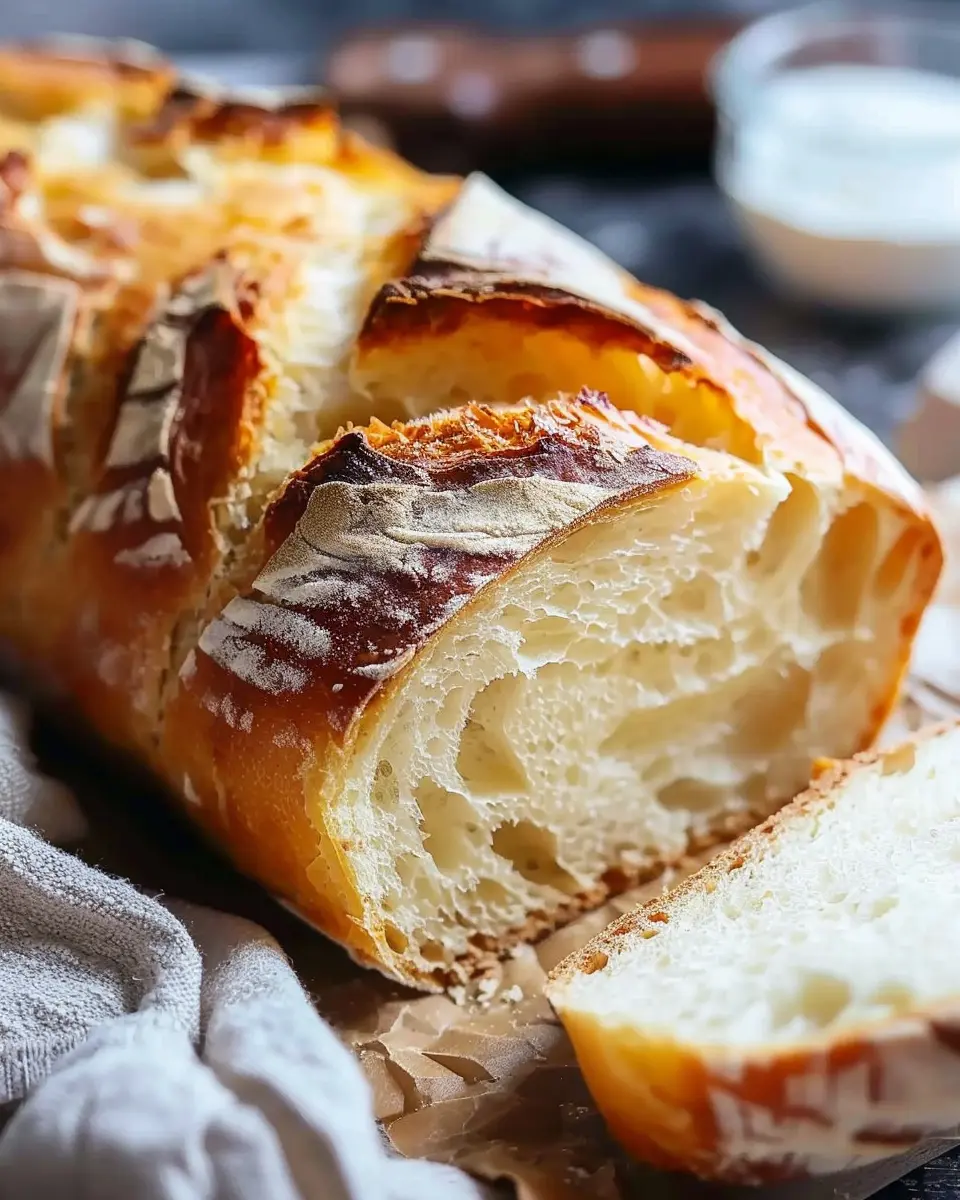
Once baked, allow your bread to cool for a few minutes in the pan before transferring it to a wire rack to cool completely. Resist the urge to slice it immediately—the texture improves as it cools.
With these steps, you’re now well on your way to mastering your beginner-friendly homemade bread recipe. The combination of scents, textures, and, let’s face it, the bragging rights of having baked your own bread are absolutely delightful. Enjoy your culinary adventure!
Variations on Beginner-Friendly Homemade Bread
Making your own bread is such a delightful journey, and once you master the basic beginner-friendly homemade bread recipe, the sky’s the limit! Here are some variations that can take your loaf from ordinary to extraordinary.
Herb-Infused Bread
Imagine pulling a loaf of warm, herb-infused bread out of your oven. The aroma of fresh rosemary, thyme, or basil wafting through your kitchen is simply irresistible. To make this variation, simply add two tablespoons of your favorite dried herbs into the dough after combining your flour and yeast. You could also opt for fresh herbs — chop them finely and toss them in.
If you want to elevate your flavor profile, consider incorporating roasted garlic or sundried tomatoes. Not only will you create a flavor explosion, but you’ll also impress your friends at your next gathering. Try it with a simple olive oil dip for an authentic Italian experience.
Cheese-Studded Bread
Who doesn’t love cheese? One of the simplest yet most indulgent twists you can add to your beginner-friendly homemade bread recipe is cheese. Shredded cheddar, parmesan, or even crumbled feta can be mixed into your dough before the first rise. Aim for about a cup of cheese for every loaf, depending on how cheesy you like it!
To make it extra special, sprinkle some cheese on top before popping it in the oven. You’ll end up with a crust that’s melty and golden brown — perfect for sandwiches or as a side to your next meal.
Each of these variations not only adds a unique taste to your bread but also gives you a chance to experiment with flavors you love. So go ahead and make it your own! If you’re curious about pairing your bread with other dishes, check out this fantastic resource for inspiration.
Cooking Tips and Notes for Beginner-Friendly Homemade Bread
Troubleshooting Common Issues
Making your beginner-friendly homemade bread can sometimes lead to unexpected results, but don’t fret! If your loaf doesn’t rise properly, consider these tips:
- Yeast Activation: Ensure your yeast is fresh; expired yeast can lead to dense bread. A simple test: proof it in warm water with a pinch of sugar. If it bubbles, you’re good!
- Dough Consistency: If your dough feels too sticky, sprinkle in a bit more flour gradually until it reaches a smooth texture. Remember, dough should be soft but not overly tacky.
Storage Options for Freshness
To keep your beautiful homemade bread fresh longer, you have a few options:
- Room Temperature: Store your bread in a paper bag in a cool, dry place for up to three days. Avoid plastic, as it can trap moisture and lead to a soggy crust.
- Freezing: For longer storage, slice your bread, wrap it tightly in plastic, and freeze. You can enjoy fresh slices anytime—just toast or let them thaw at room temperature.
Happy baking! For more tips on bread-making, check out King Arthur Baking.

Serving Suggestions for Beginner-Friendly Homemade Bread
Pairing with Spreads and Toppings
Once you’ve mastered your beginner-friendly homemade bread recipe, the fun continues when it comes to enjoying it! This bread is versatile and perfect for various toppings:
- Spreadable Delights: Creamy butter or a drizzle of olive oil can elevate the flavor. Try flavored butters like garlic herb for a delightful twist.
- Cheeses: Pair with a slice of sharp cheddar or creamy brie. These flavors contrast beautifully with the warm bread.
- Deli Meats: Layers of turkey bacon or chicken ham can create a satisfying sandwich. Add leafy greens and a dab of mustard for a fresh bite.
These simple toppings not only boost flavor but also make for a beautiful presentation.
Creating a Bread Basket Experience
Why not turn your beginner-friendly homemade bread into an inviting dining experience?
- Decorative Presentation: Serve slices warm in a charming bread basket, lined with a cloth to keep them cozy.
- Accompaniments: Include small bowls of olives, nuts, and spreads like hummus or tapenade.
This setup not only brings a delightful aroma to the table but also encourages a joyful sharing atmosphere. Plus, you’ll impress your guests with your stylish serving!
For more serving ideas, check out The Spruce Eats.
Time Breakdown for Beginner-Friendly Homemade Bread
Preparation Time
Getting started with our beginner-friendly homemade bread recipe takes about 15 minutes. You’ll mix the flour, water, yeast, salt, and any other ingredients you’re using. This is your chance to set the mood in the kitchen—crank up your favorite playlist or podcast!
Rising Time
After mixing, let your dough rise for about 1 to 2 hours. During this time, it will double in size! It’s a great opportunity to take a break, maybe prep some Turkey Bacon or Chicken Ham for sandwiches later, or even clean up the kitchen.
Baking Time
Once the dough has risen, pop it in the oven for about 30-35 minutes. This is where the magic happens—the smell of freshly baked bread will fill your kitchen and bring everyone running!
Total Time
In total, from start to finish, you’re looking at roughly 2 to 2.5 hours. But don’t worry—it’s mostly hands-off time! With each step, you’ll have created a delightful bread that’s perfect for sandwiches, snacking, or even gifting to a neighbor.
For more bread-making inspiration, check out King Arthur Baking for additional tips and recipes!
Nutritional Facts for Beginner-Friendly Homemade Bread
Serving Size
When it comes to enjoying your beginner-friendly homemade bread, understanding portion control can help you savor every slice! A typical serving size is about one slice (about 28 grams), making it easy to incorporate into any meal.
Calories
One slice of homemade bread usually contains around 70-80 calories. It’s a great base for various toppings, like avocado or Turkey Bacon, without piling on too many calories.
Carbohydrates
Each slice delivers about 14-15 grams of carbohydrates. These provide the energy you need to get through your day while complementing a balanced diet.
Protein
For a wholesome touch, homemade bread offers approximately 2-3 grams of protein per slice, contributing to your overall intake. Pairing it with some protein-rich toppings, like chicken ham, can boost this even further!
By making your own bread at home, you not only have control over the ingredients but also the satisfaction of a freshly baked loaf. For more nutritional information, check resources like the USDA FoodData Central or the Mayo Clinic for comprehensive guides on nutrition!
FAQs about Beginner-Friendly Homemade Bread
Can I use whole wheat flour?
Absolutely! If you’re interested in a healthier option, substituting some or all of the white flour with whole wheat flour can give your bread a delightful nutty flavor and added nutrition. Just keep in mind that whole wheat flour absorbs more liquid, so you may need to increase the water in your beginner-friendly homemade bread recipe. A good rule of thumb is to start with a mix of 50% white and 50% whole wheat and adjust from there, ensuring a light texture and robust taste.
How do I know when the bread is done?
Knowing when your bread is perfectly baked can feel daunting, but it’s simpler than you think! Here are some tips:
- Color: Look for a lovely golden-brown crust.
- Sound: Gently tap the bottom of the loaf; if it sounds hollow, it’s done.
- Temperature: Use an instant-read thermometer. The internal temperature should be around 190-200°F.
Every oven is different, but following these cues can help you master your bread-making skills in no time!
What can I do with leftover bread?
Don’t let that precious bread go to waste! Here are some tasty ideas:
- Croutons: Cube your leftover bread, toss with olive oil and seasoning, and bake for homemade croutons.
- Bread Pudding: Transform stale pieces into a sweet and comforting dessert.
- Grilled Cheese: Use your bread for a scrumptious sandwich—perfect for a cozy meal!
For more fun recipes and tips, check out sites like The Kitchn and Serious Eats. Happy baking!
Conclusion on Beginner-Friendly Homemade Bread
Baking your own bread might feel intimidating at first, but with this beginner-friendly homemade bread recipe, you’ll discover it’s much easier than you think. The reward of pulling a warm, savory loaf from your oven is unmatched. Whether you’re enjoying it fresh with a pat of butter or as a base for your favorite sandwich, you’ll delight in the flavors and aromas that fill your kitchen.
Remember, practice makes perfect! Don’t hesitate to experiment with different ingredients like herbs or seeds. And if you’re itching for more inspiration, check out resources like the King Arthur Baking Company for additional tips and techniques. Happy baking!
PrintBeginner-Friendly Homemade Bread Recipe for the Best Fresh Loaf
Learn how to make a delicious and easy homemade bread that is perfect for beginners.
- Prep Time: 15 minutes
- Cook Time: 35 minutes
- Total Time: 2 hours 15 minutes
- Yield: 1 loaf
- Category: Bread
- Method: Baking
- Cuisine: American
- Diet: Vegetarian
Ingredients
- 3 cups all-purpose flour
- 1.5 teaspoons salt
- 1 packet active dry yeast
- 1.5 cups warm water
- 1 tablespoon sugar
- 2 tablespoons olive oil
Instructions
- In a large bowl, combine warm water, sugar, and yeast; let it sit for 5-10 minutes until frothy.
- Add salt and olive oil to the yeast mixture, then gradually stir in the flour until a dough forms.
- Knead the dough on a floured surface for about 8-10 minutes until smooth.
- Place the dough in a greased bowl, cover with a towel, and let it rise for 1-2 hours until doubled in size.
- Punch down the dough, shape it into a loaf, and place it in a greased loaf pan.
- Let it rise again for about 30-45 minutes.
- Bake in a preheated oven at 375°F (190°C) for 30-35 minutes or until golden brown.
- Cool on a wire rack before slicing.
Notes
- For a richer flavor, add herbs or garlic to the dough.
- Make sure your water is not too hot, or it may kill the yeast.
Nutrition
- Serving Size: 1 slice
- Calories: 120
- Sugar: 1g
- Sodium: 200mg
- Fat: 2g
- Saturated Fat: 0.5g
- Unsaturated Fat: 1g
- Trans Fat: 0g
- Carbohydrates: 22g
- Fiber: 1g
- Protein: 4g
- Cholesterol: 0mg