Introduction to Christmas Cherry Bars
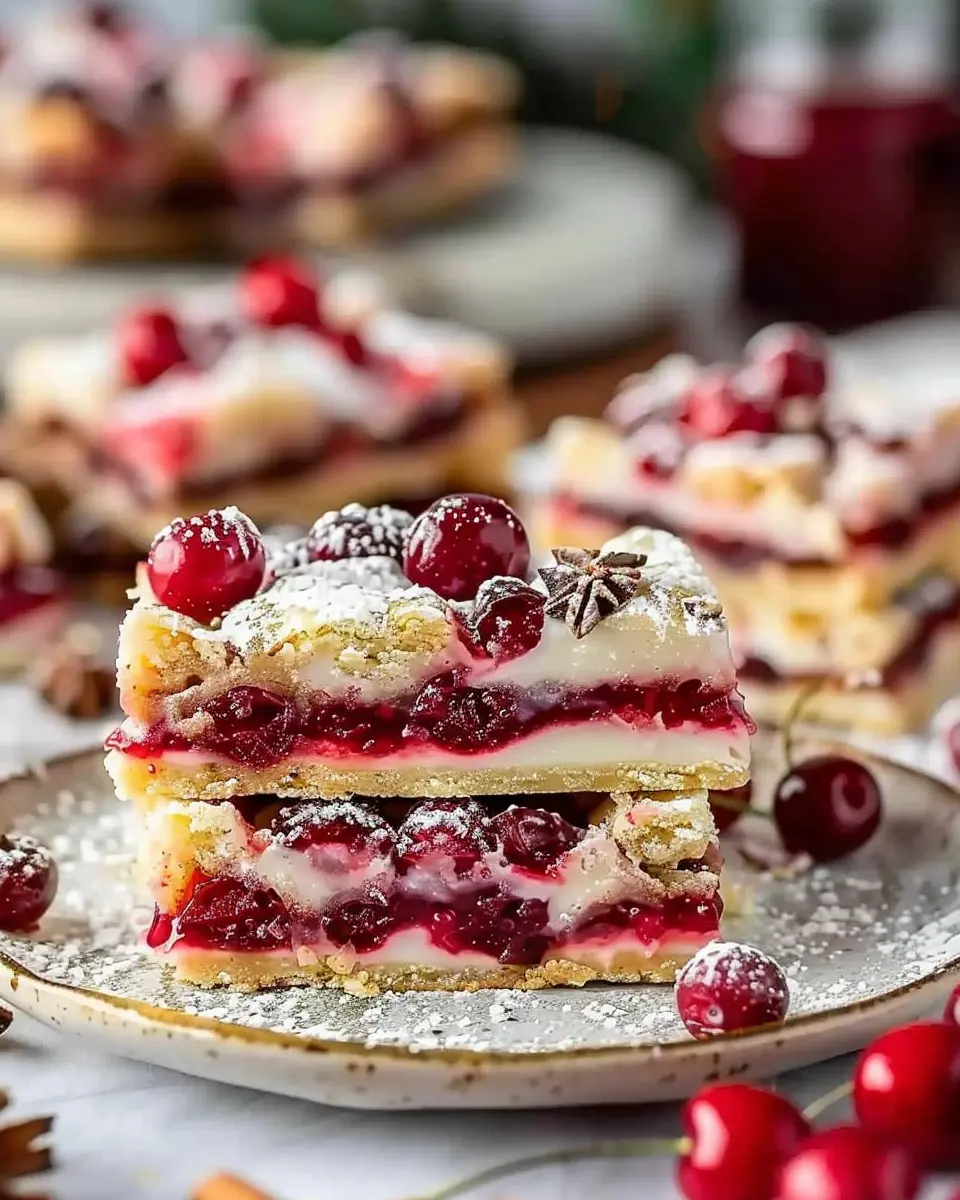
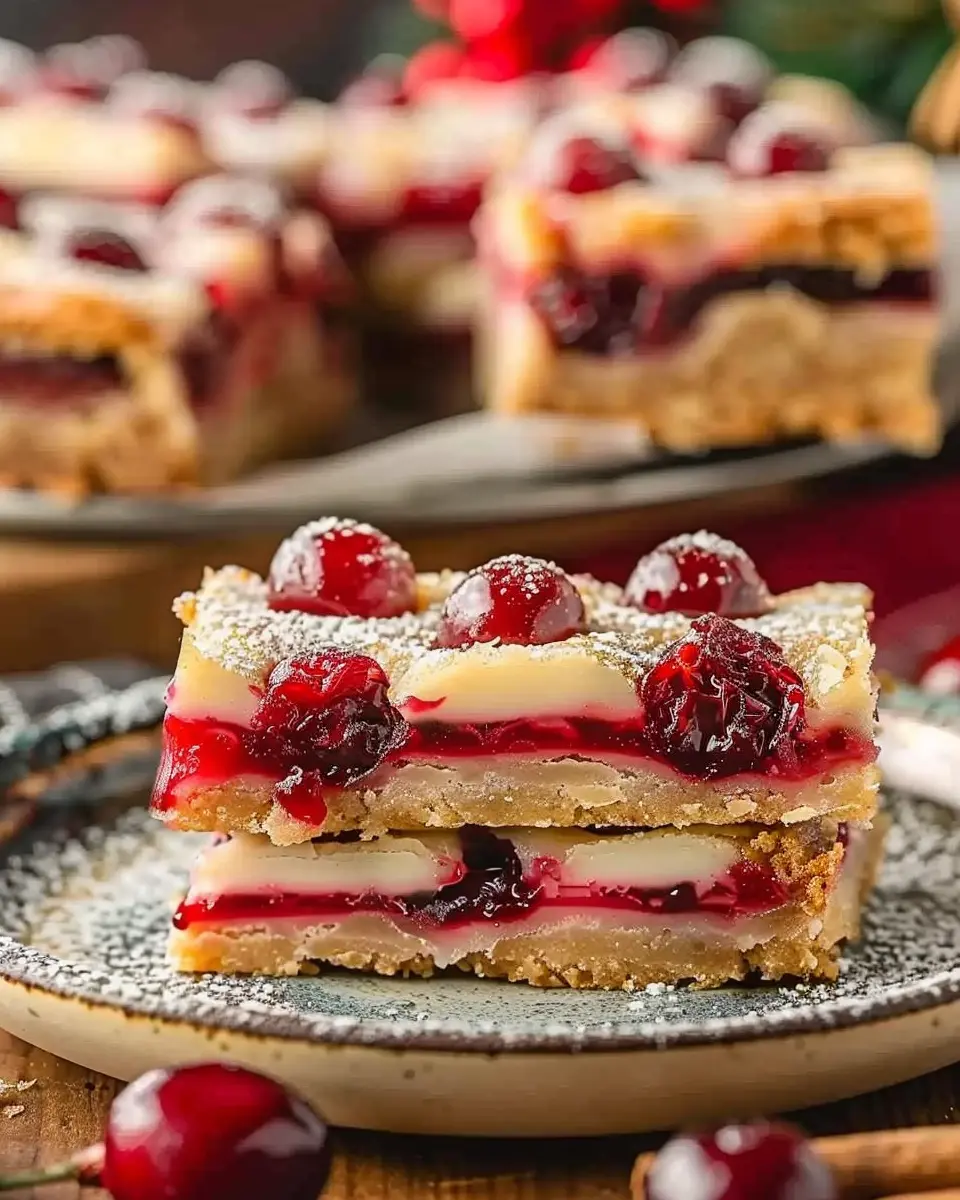
The holiday season is a time for celebration, warmth, and of course, delicious treats. If you’re searching for the perfect festive dessert, look no further than Christmas Cherry Bars. These delightful dessert squares combine a buttery crust, sweet cherry filling, and a crumbly topping, making them a delightful addition to any holiday table.
Why are Christmas Cherry Bars the perfect holiday treat?
Versatility is a hallmark of Christmas Cherry Bars. Whether you’re hosting a holiday party, going to a family gathering, or even just looking to spice up your cookie exchange, these bars are a fantastic choice. They are easy to cut into bite-sized pieces, making them shareable and portable. Everyone loves a treat they can enjoy with friends over a hot beverage or as a sweet snack while wrapping gifts.
But there’s more to these bars than just convenience. They are a wonderful balance of sweet and tart flavors, thanks to the cherry filling. The pop of cherries becomes an unexpected treat—a true burst of flavor that complements the soft, buttery crust. According to a recent study by Food & Wine, including fruit in desserts not only enhances taste but also adds nutritional value, making your treats feel a little less indulgent.
Planning a gathering? Research from the American Institute of Stress indicates that sharing food can strengthen social bonds. So, imagine your friends and family smiling over a plate of freshly baked Christmas Cherry Bars, reminiscing about the good times—with each bite sparking joy and connection.
Easy to make and requiring simple ingredients, you’ll find that whipping up a batch doesn’t take much time at all. In fact, if you fancy a personalized touch, you can easily swap out the cherries for another fruit or even create festive variations with nuts or chocolate. Check out the Cherry Marketing Institute for more creative ideas on fruit-based desserts.
So, get ready to add Christmas Cherry Bars to your holiday baking list! They’re bound to become a cherished part of your festive traditions, blending flavor, fun, and the joy of sharing in one delightful package.
Ingredients for Christmas Cherry Bars
Creating delightful Christmas Cherry Bars is an enjoyable way to celebrate the festive season! Let’s dive into the essential ingredients you’ll need to make these delicious treats.
Essential Ingredients for the Base
To craft the perfect base for your Christmas Cherry Bars, gather the following:
- Butter: Unsalted works best for controlling the saltiness.
- Granulated Sugar: A must for that sweet, comforting flavor.
- All-Purpose Flour: This will give structure to your bars.
- Eggs: They bind everything together for an ideal texture.
- Baking Powder: For a little lift and fluffiness.
Ingredients for the Filling and Topping
Now, let’s talk about that scrumptious filling and topping that brings everything together:
- Cherry Pie Filling: Use a can or make your own for a fresh touch.
- Almond Extract: Just a splash adds a delightful layer of flavor.
- Oats: Rolled oats not only enhance the texture but also make it wholesome.
- Brown Sugar: For a rich sweetness and a bit of chewiness.
- Chopped Nuts: Walnuts or pecans can add a lovely crunch.
Once you’ve gathered these ingredients, you’re all set to start your baking adventure!
For more tips on baking with cherries, check out this guide from the Cherry Marketing Institute. Happy baking!
Preparing Christmas Cherry Bars
Let’s dive into the delightful world of Christmas Cherry Bars! If you’re dreaming of a festive treat that combines the sweetness of cherries and the rich decadence of chocolate, look no further. These bars are perfect for holiday gatherings, cookie exchanges, or just indulging while curled up by the fire. The best part? They’re easier to make than you might think!
Gather Your Ingredients
Before you start baking, it’s essential to gather everything you need. Having all your ingredients on hand makes the process smoother and more enjoyable. Here’s what you’ll need:
-
For the crust:
-
1 ½ cups all-purpose flour
-
½ cup powdered sugar
-
½ cup unsalted butter, softened
-
1 teaspoon vanilla extract
-
For the cherry and chocolate filling:
-
1 can (21 ounces) cherry pie filling
-
1 cup semi-sweet chocolate chips
-
2 large eggs
-
1 teaspoon almond extract
-
For the topping:
-
½ cup chopped walnuts or pecans (optional)
-
Extra chocolate chips for sprinkling (optional)
Gathering these items can be a fun pre-baking ritual. Did you know that cherry pie filling is a staple in many holiday recipes, thanks to its vibrant color and festive flavor? For some inspiration, check out this food blog on holiday baking.
Make the Crust
Once you have your ingredients ready, it’s time to whip up that buttery crust.
- Preheat your oven to 350°F (175°C).
- In a large mixing bowl, combine the flour and powdered sugar.
- Add the softened butter and vanilla extract.
- Use your hands or a pastry cutter to mix until you achieve a crumbly texture.
- Press this mixture evenly into the bottom of a greased 9×13-inch baking pan.
This crust is not only the base for your Christmas Cherry Bars but also adds a rich flavor and texture. Once it’s pressed down, pop it in the oven and bake for about 15 minutes or until lightly golden.
Prepare the Cherry and Chocolate Filling
While the crust bakes, you can prepare the cherry and chocolate filling.
- In a medium-sized bowl, mix the cherry pie filling, eggs, chocolate chips, and almond extract until well combined.
- If you’re a chocolate lover, feel free to add more chocolate chips into the mix!
This step is crucial because it’s where the magic happens. The combination of cherries and chocolate makes this filling irresistible. Plus, cherries are packed with antioxidants, making this festive treat just a tad healthier!
Assemble the Bar Layers
Once the crust has cooled slightly, it’s time to combine the layers.
- Pour the cherry and chocolate mixture over the crust, spreading it evenly.
- If using nuts, sprinkle them on top along with some extra chocolate chips for that indulgent touch.
This layered assembly allows the flavors to meld together beautifully as they bake.
Bake and Cool the Bars
Now, it’s time to bake your Christmas Cherry Bars!
- Return the assembled pan to the oven and bake for about 30–35 minutes, or until the filling is set and starting to bubble.
- Once done, remove from the oven and allow the bars to cool in the pan.
After cooling, slice into squares, and get ready for holiday compliments! These bars are perfect when served with a warm cup of cocoa or a festive hot apple cider.
Enjoy making these delicious Christmas Cherry Bars and watch them make your holiday gatherings even more memorable! Don’t forget to share your creations and experiences, as I’d love to hear how your baking adventure turned out!
Variations on Christmas Cherry Bars
Whether you’re whipping up Christmas Cherry Bars for a festive gathering or a cozy night in, there’s always room to add a personal touch. Let’s explore some delightful variations that can elevate your classic recipe!
Festive Additions: Nuts and Spices
Nuts and spices can play a transformative role in your Christmas Cherry Bars. Consider incorporating:
- Chopped walnuts or pecans: These nuts add a rich, buttery flavor and delightful crunch.
- Almond extract: Just a splash can bring a lovely warmth that pairs beautifully with cherries.
- Ground nutmeg or cinnamon: Sprinkle in some of these spices to evoke that classic holiday aroma.
These additions not only enhance the flavor but also contribute a festive vibe that’s off the charts.
Alternative Fruits and Chocolates
Looking for something different? Explore swapping out cherries or adding extra elements:
- Dried cranberries or apricots: For a tart twist, dried cranberries introduce a zing that complements the sweetness of the bars.
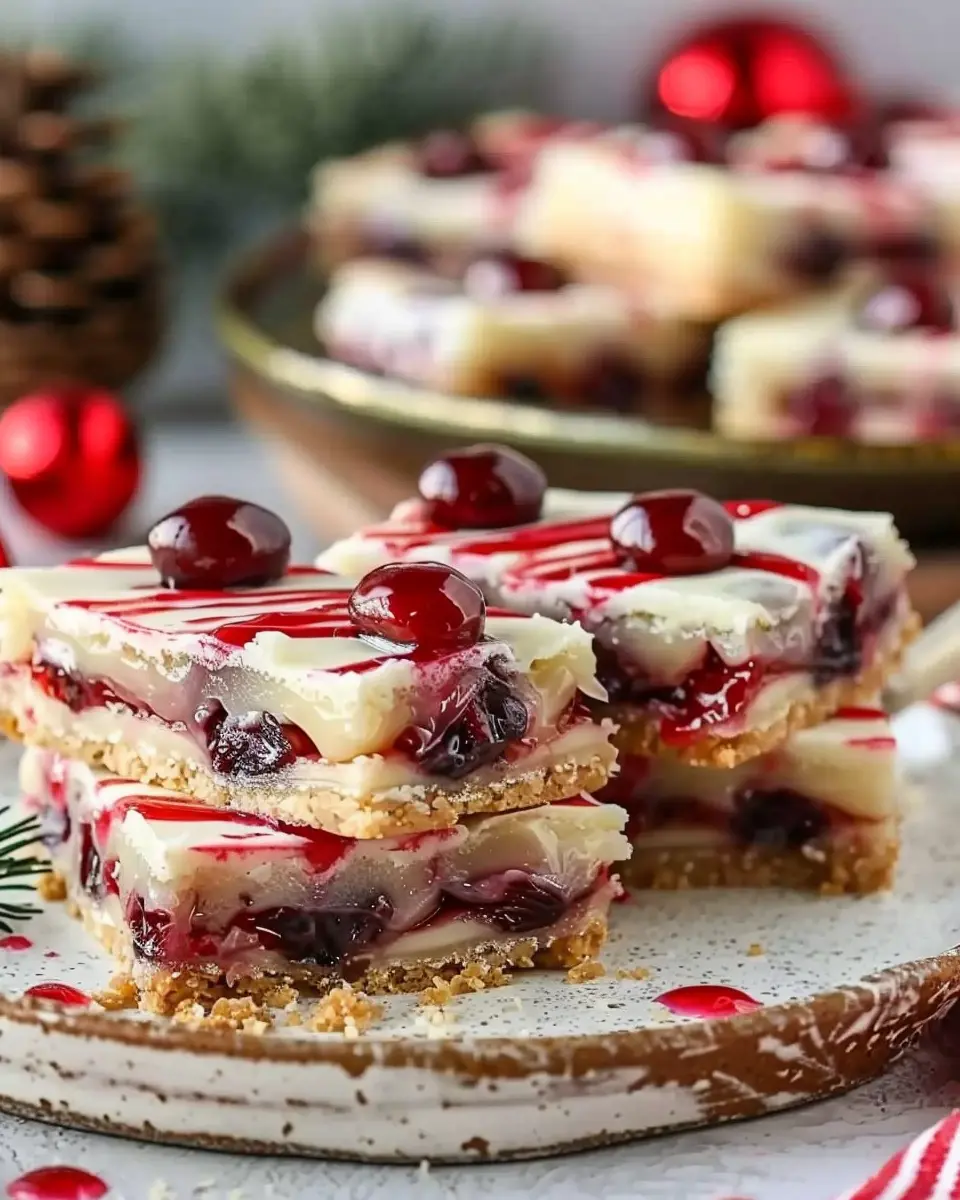
- White chocolate chips: These provide a creamy richness that contrasts beautifully with the cherry filling.
- Dark chocolate chunks: For a sophisticated touch, dark chocolate pairs well with both the flavor and color of your bars.
Don’t hesitate to mix and match these ingredients to discover a combination that suits your palate. With so many options, your Christmas Cherry Bars could be the highlight of the dessert table this season!
Experiment with these variations and let us know your favorites! For more inspiration, check out this holiday baking guide.
Tips for Success with Christmas Cherry Bars
Keeping Your Butter Cold
To ensure your Christmas Cherry Bars have that perfect flaky texture, it’s crucial to keep your butter cold. Cold butter works wonders when it comes to creating a light and airy crumb. Chop your butter into small cubes and pop it in the freezer for about 15 minutes before mixing. This trick adds a delightful layer of flavor and texture, making your bars truly special! If you’re interested in more baking tips, check out this guide on butter temperatures and textures.
Cooling Before Cutting
You might be tempted to slice into your Christmas Cherry Bars right out of the oven, but patience is key here. Let the bars cool completely in the pan for at least 30 minutes. Cutting them while they’re still warm can result in a messy, crumbly situation. Trust me, giving them time to set will make your presentation as appealing as the taste. Once cooled, slice into even squares for that Instagram-worthy look!
Happy baking!
Serving Suggestions for Christmas Cherry Bars
How to Present the Bars
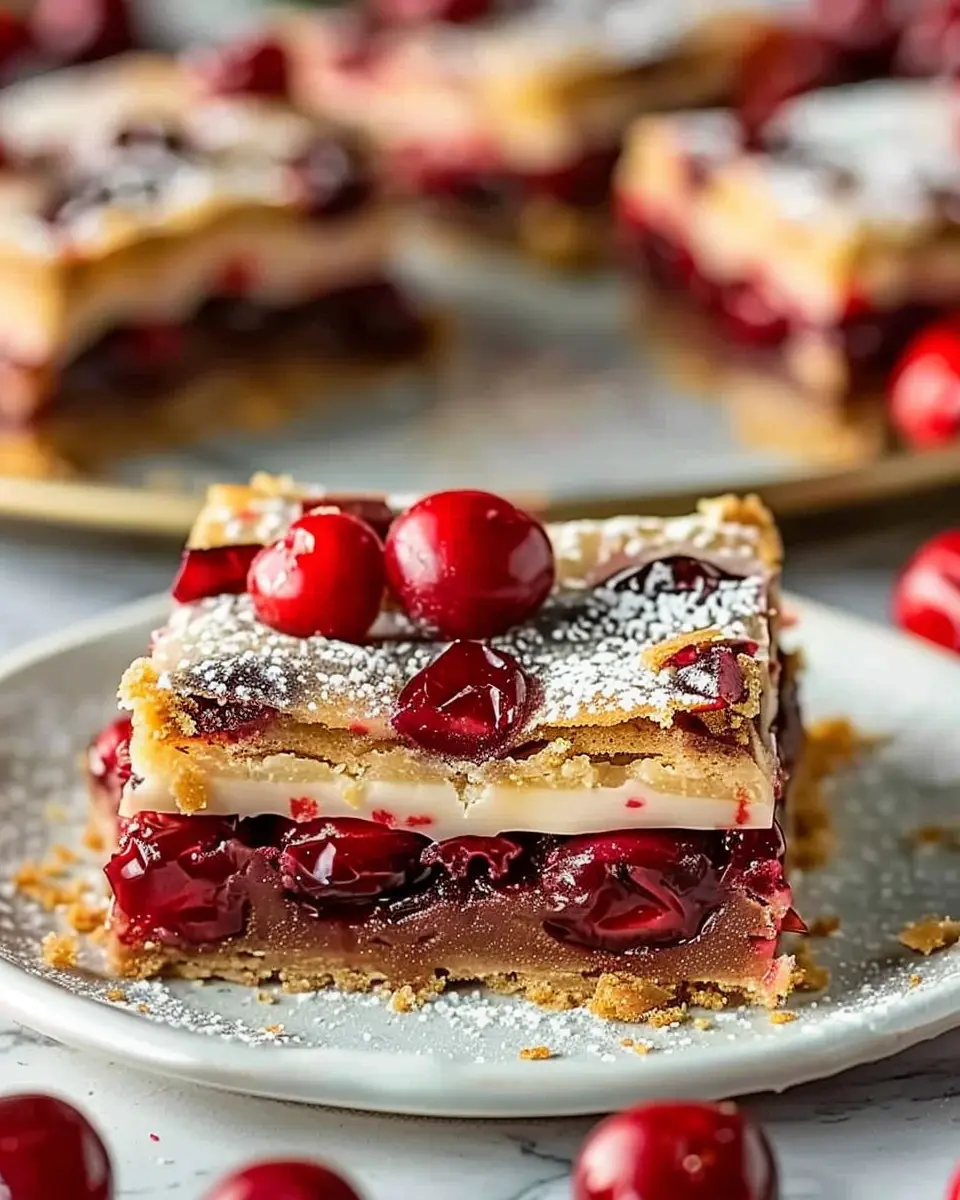
When it comes to serving your delightful Christmas Cherry Bars, presentation is key to making them festive and appealing! Start by cutting the bars into neat squares or rectangles and arrange them on a beautiful platter. For a touch of holiday spirit, garnish with a sprinkle of powdered sugar or place fresh cherries on top. You might even consider using decorative cupcake liners for individual servings, especially if you’re sharing these treats at a holiday gathering. Adding a mint leaf or two can also elevate the visual appeal!
Perfect Pairings with Beverages
Now, let’s talk about pairing. The sweet-tart flavor of Christmas Cherry Bars complements various drinks perfectly:
- Hot Cocoa: A classic choice, especially when topped with whipped cream.
- Herbal Tea: A chamomile or peppermint tea brings a soothing contrast.
- Sparkling Water: Add a slice of lemon or lime for a refreshing twist.
These alternatives will allow the delightful flavors of your cherry bars to shine while leaving your guests satisfied but not overwhelmed. For more creative beverage ideas, check out this great resource on holiday drinks!
Time Breakdown for Christmas Cherry Bars
When it comes to whipping up delightful Christmas Cherry Bars, knowing the time needed is essential for planning your festive baking. Here’s a quick breakdown to keep things organized!
Preparation Time
Take around 15-20 minutes to gather your ingredients and get the Christmas Cherry Bars batter ready. Make sure you’ve got everything at hand—no one wants to be searching through the pantry mid-mix!
Baking Time
You’ll need approximately 25-30 minutes for baking. While your bars are in the oven, take a moment to enjoy the mouthwatering aroma filling your kitchen. Anticipation is part of the fun!
Total Time
In just about 45-50 minutes, you’ll have your delicious Christmas Cherry Bars ready to be enjoyed. Perfect for cozy gatherings or as a sweet gift for neighbors. Plus, baking can be a delightful way to unwind after a busy day—what’s not to love?
For more tips on choosing the right cherries, check out this resource that dives into fruit selection and storage. Enjoy your baking adventure!
Nutritional Facts for Christmas Cherry Bars
When indulging in festive treats, it’s always good to understand what you’re enjoying. Let’s break down the nutritional facts for these delightful Christmas Cherry Bars.
Calories
Each bar typically contains around 150-200 calories. A satisfying dessert that won’t derail your holiday diet plans!
Sugar Content
With approximately 10-15 grams of sugar per serving, these bars bring the sweet taste of cherries to life. Choosing options like organic or less-refined sugars can be a game-changer.
Dietary Considerations
These Christmas Cherry Bars can be easily modified to suit various dietary needs. For a gluten-free option, use almond flour instead of wheat flour. If you’re vegan, consider substituting eggs with unsweetened applesauce or flax eggs. Feeling adventurous? Check out more about nutritional swaps on Healthline.
The beauty of these bars lies in their versatility, making festive gatherings even sweeter while keeping mindful of your health. What’s your favorite way to enjoy cherry desserts?
FAQs about Christmas Cherry Bars
As you prepare to indulge in the delightful world of Christmas Cherry Bars, you might have a few questions. Let me help clarify some common inquiries!
Can I replace the dried cherries with fresh ones?
Absolutely! While dried cherries provide a concentrated burst of flavor and sweetness, fresh cherries can be an excellent substitute. When using fresh cherries, be sure to pit and chop them into smaller pieces so they can integrate nicely into the bars. Just keep in mind that fresh cherries have a higher moisture content, which may affect the consistency of your bars. A slight increase in baking time might be necessary, so keep an eye on them!
What are good storage options for the bars?
To maintain the freshness of your Christmas Cherry Bars, you have a couple of tasty storage options:
- Room Temperature: Place the bars in an airtight container and keep them in a cool, dry place for up to three days.
- Refrigeration: If you want to keep them longer, store them in the refrigerator for about a week. Just make sure to seal them well to prevent them from drying out.
If you’re interested in extending their shelf life, you can also freeze the bars. Wrap them tightly in plastic wrap or aluminum foil and place them in a freezer-safe container for up to three months.
How long can I keep Christmas Cherry Bars?
On average, you can keep your Christmas Cherry Bars fresh for about a week in the refrigerator. If you’ve frozen them, just remember to let them thaw in the fridge overnight before enjoying. It’s a great way to have a festive treat ready even after the holiday season.
If you’re looking for more tips on preserving your holiday treats, consider checking out resources from the USDA or food preservation guides. Happy snacking!
Conclusion on Christmas Cherry Bars
Why you should try making these delightful treats this holiday season
Christmas Cherry Bars are a must-have for your festive spread this year! Not only do they offer a delightful combination of sweet and tart flavors, but they also add a splash of color to your dessert table. Made with simple ingredients, these bars are easy to whip up, making them an excellent choice for busy holiday schedules.
Imagine sharing these delightful treats with friends and family or even gifting them to neighbors. Plus, they’re versatile; you can customize them with different fruits or toppings! Spice up your holiday baking by trying out this wonderful recipe. Check out resources like the Food Network for more holiday baking inspiration.
Embrace the joy of the season with Christmas Cherry Bars—a treat everyone will love!
PrintChristmas Cherry Bars: Easy Indulgence for Your Holiday Festivities

Delight in the festive spirit with these easy-to-make Christmas Cherry Bars, perfect for your holiday gatherings.
- Prep Time: 15 minutes
- Cook Time: 35 minutes
- Total Time: 50 minutes
- Yield: 12 servings
- Category: Dessert
- Method: Baking
- Cuisine: American
Ingredients
- 1 cup all-purpose flour
- 1 cup granulated sugar
- 1/2 cup unsalted butter
- 2 large eggs
- 1 teaspoon vanilla extract
- 1 can (15 ounces) cherry pie filling
- 1/2 teaspoon baking powder
- 1/4 teaspoon salt
Instructions
- Preheat your oven to 350°F (175°C).
- In a mixing bowl, cream together the butter and sugar until light and fluffy.
- Add the eggs and vanilla extract, mixing until well combined.
- In another bowl, whisk together the flour, baking powder, and salt.
- Gradually add the dry ingredients to the wet mixture, mixing until just combined.
- Spread half of the batter into a greased 9×13 inch baking dish.
- Spoon the cherry pie filling over the batter.
- Drop the remaining batter by spoonfuls over the cherry filling.
- Bake for 30-35 minutes or until golden brown.
- Let cool before cutting into bars.
Notes
- For an extra touch, dust with powdered sugar before serving.
- These bars can be made a day ahead and stored covered at room temperature.
Nutrition
- Serving Size: 1 bar
- Calories: 180
- Sugar: 22 grams
- Sodium: 150 milligrams
- Fat: 7 grams
- Saturated Fat: 4 grams
- Unsaturated Fat: 2 grams
- Trans Fat: 0 grams
- Carbohydrates: 25 grams
- Fiber: 1 gram
- Protein: 2 grams
- Cholesterol: 30 milligrams